
When you’re creating PowerPoint slides under tight deadlines, the last thing you need is to spend valuable time crafting illustrations from scratch. Thankfully, SmartArt graphics can save you both time and effort, allowing you to create impressive visuals that will wow your audience. A well-designed PowerPoint slide can make your message clear and memorable. One of the best tools for creating engaging visuals in PowerPoint is SmartArt.
What is SmartArt?
| SmartArt is a collection of pre-made charts, graphics, and data visual styles that allows you to create professional-quality presentations with ease. Whether you need to illustrate a process, show a hierarchy, or highlight relationships, SmartArt provides a variety of templates to suit your needs. |  |
SmartArt keeps you on top of your game.
Advantages of SmartArt

(Use the SmartArt “List” in the above image”)
- Time Efficiency: Pre-designed Templates and Easy Customization save time.
- Enhanced Visual Appeal: Provides professional, consistent graphics that enhance the look of presentations.
- Simplifies Complex Information: Breaks down complex data into clear, understandable visuals.
- Easy to Use: Intuitive interface with drag-and-drop functionality.
- Customizable: Flexible designs with options to change colors, styles, and effects
- Integration with Other Features: Compatible with animations and can convert bullet points into engaging visuals.
- Effective Communication: Improves clarity and keeps the audience engaged with appealing visuals.
Types of SmartArt Graphics
- List: Ideal for presenting information belonging to a group. Useful for bullet points or steps. Example: 3 main takeaways from this presentation.

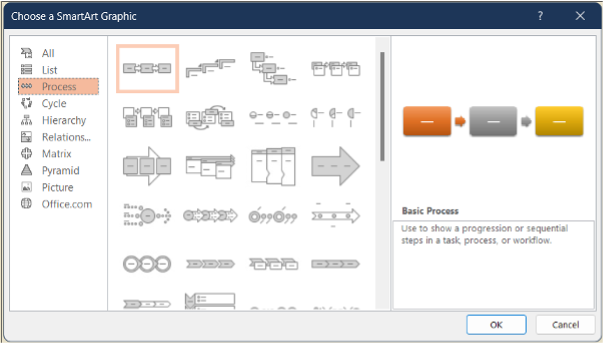
- Process: Suitable for illustrating a sequence of steps or stages in a process. Example: Steps by step framework on how to make a PowerPoint presentation
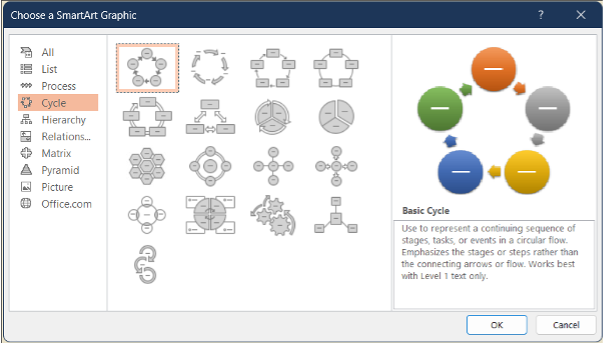
- Cycle: Shows a continuous, on-going sequence of stages. Example: Cash conversion cycle for financial analysis.
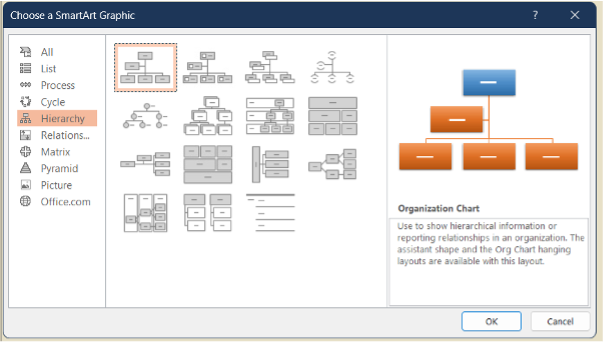
- Hierarchy: Used to display how things descend in an organization or process. Example: An organization structure of a publicly listed company.
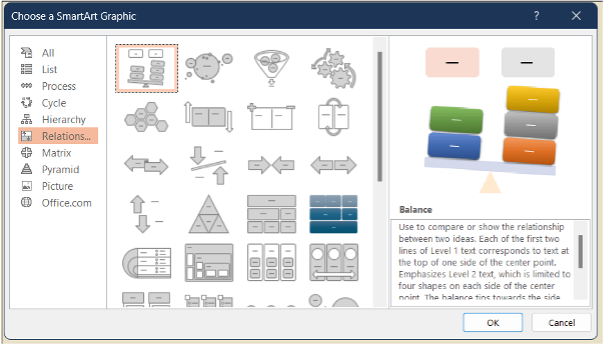
- Relationship: Helps in illustrating the relationships between different elements or concepts. You can see that there are a variety of relationship charts: balance charts, funnels, and hexagons. Example: Balance can be used to show a comparison between iPhone and Android Phone.
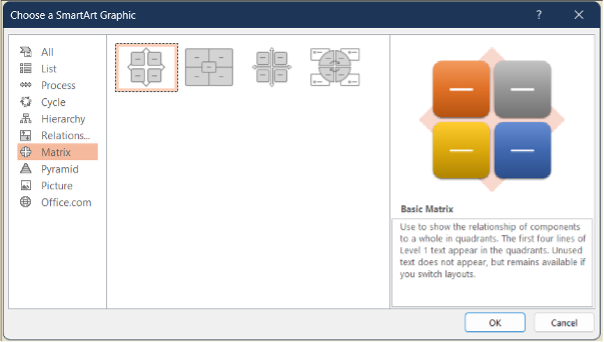
- Matrix: Useful for showing how components relate to the whole. Example: 4 key products of a company.
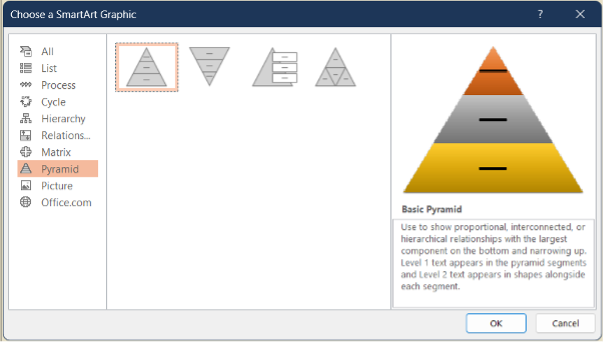
- Pyramid: Good for displaying proportional or hierarchical relationships. Example: Demographic breakdown by different income group.
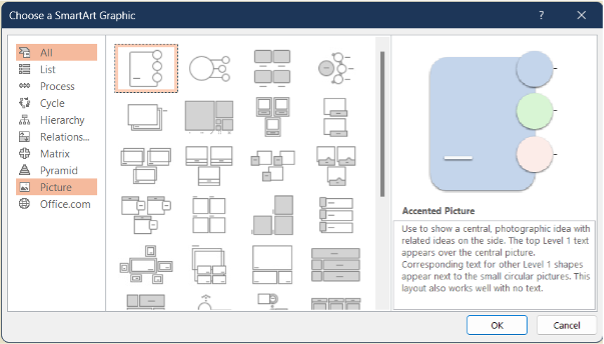
- Picture: Allows for the inclusion of images within the graphic to enhance visual appeal. Example: Describing 3 key features of an insurance policy.
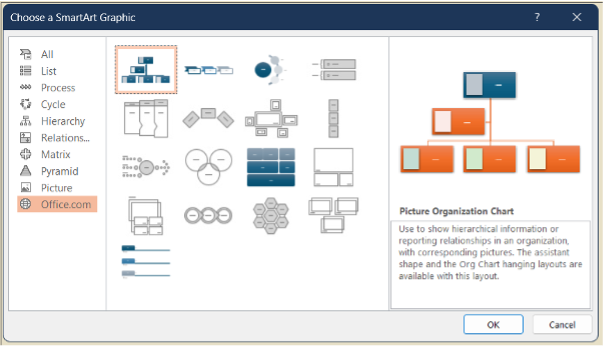
- Office.com: Provides access to additional SmartArt graphics available online through Office.com.
**
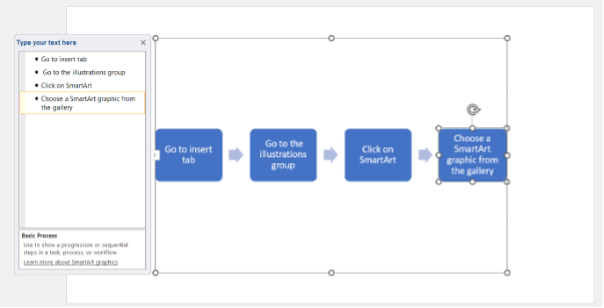
How to Insert SmartArt in PowerPoint
1. Go to the Insert tab. Navigate to the Illustrations Group.
2. Click on SmartArt.
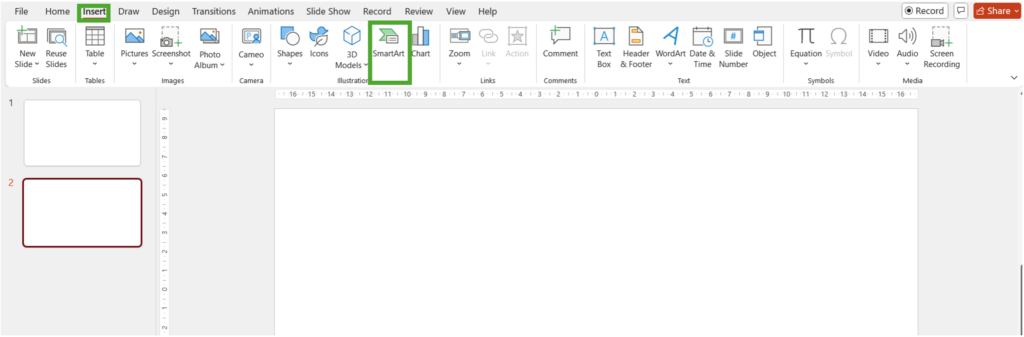
3. Choose a SmartArt graphic from the gallery.
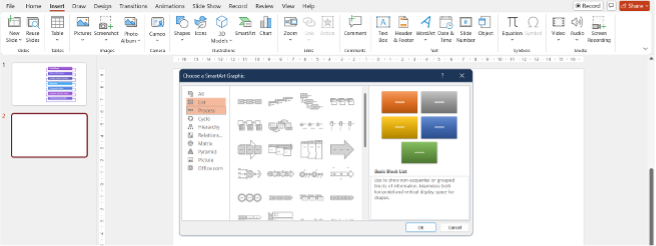
4. Insert and customize the graphic.
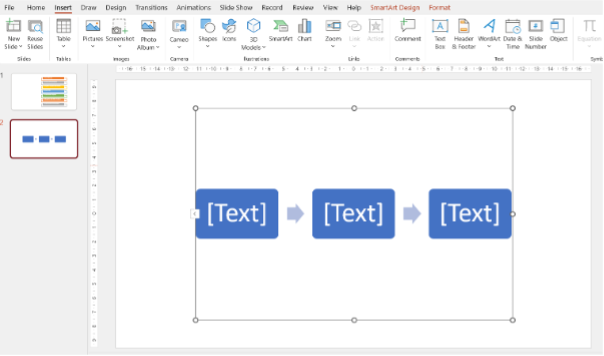
(used basic process SmartArt in PowerPoint in above illustration)
Pro tip: You can also click on the SmartArt Graphic Command in the placeholder to add SmartArt. Additionally, the size of SmartArt will adjust itself to the proportionate size of the placeholder box. Watch the gif below to see the steps:
**
How to Insert Text in SmartArt
1. Click on the SmartArt Graphic. A text pane will appear to the left.
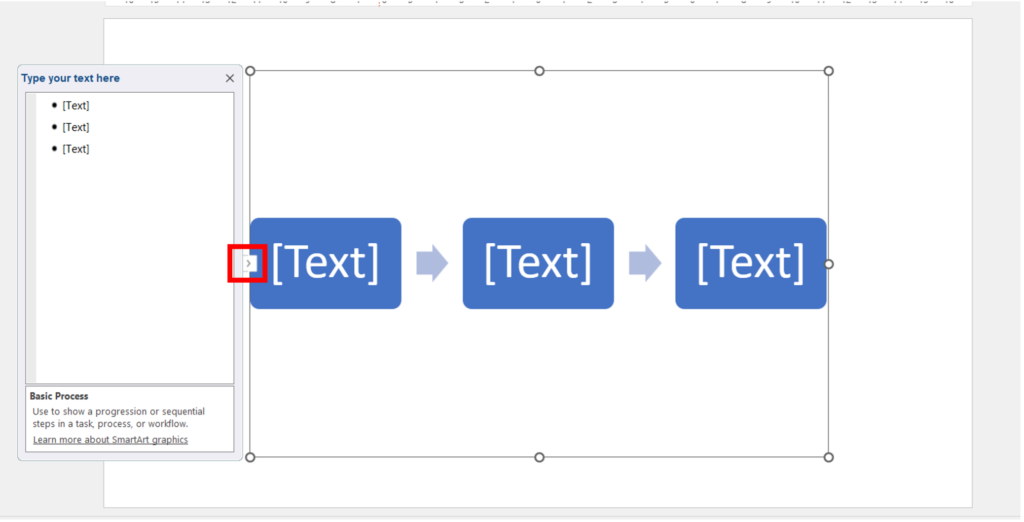
To open and close the text pane. Click on the arrow key on the left to toggle it.
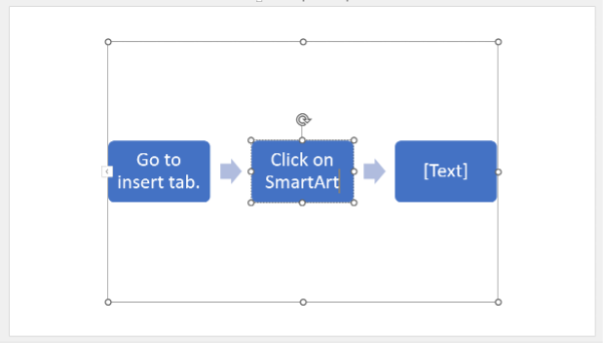
2. Enter the text next to each bullet in the text pane. The text will appear in the corresponding shape and be resized and customized according to the shape.
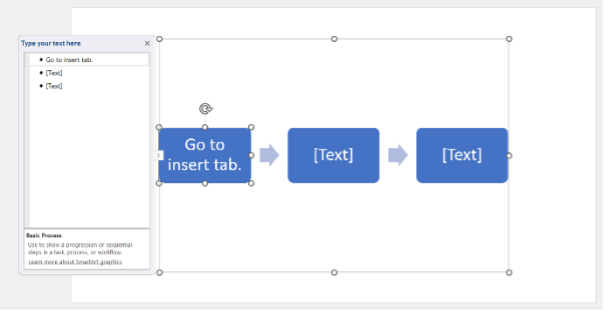
Pro tip: You can also add text by clicking on the desired shape and typing.
**
Converting Bullets into SmartArt Graphic
Highlight your bullet points, right-click, and select Convert to SmartArt.
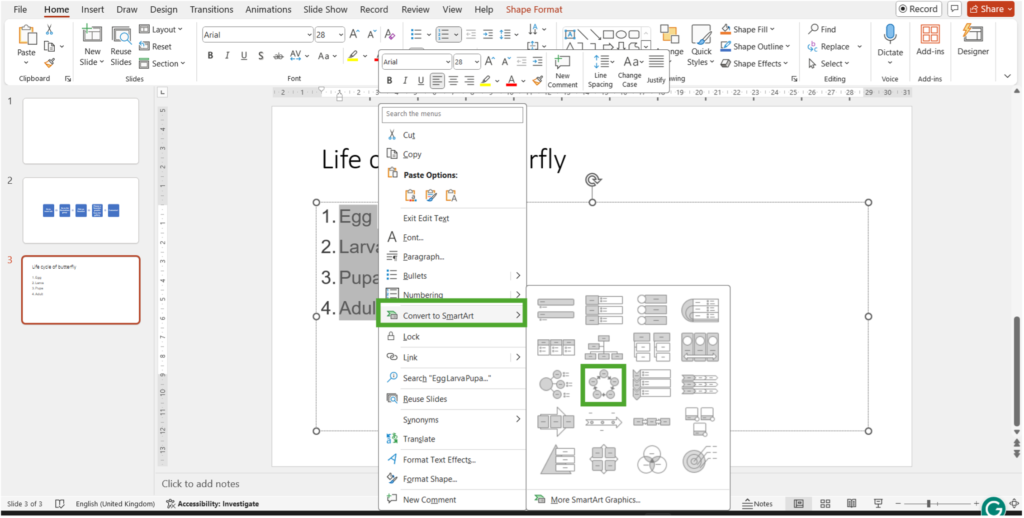
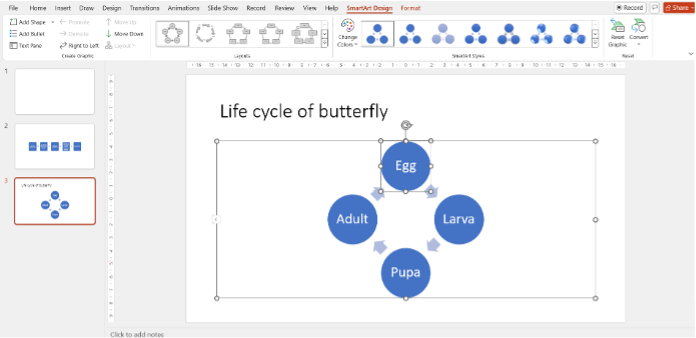
(Used Basic Cycle Graphic in the above illustration)
Reorder, Add and Delete Shapes in SmartArt
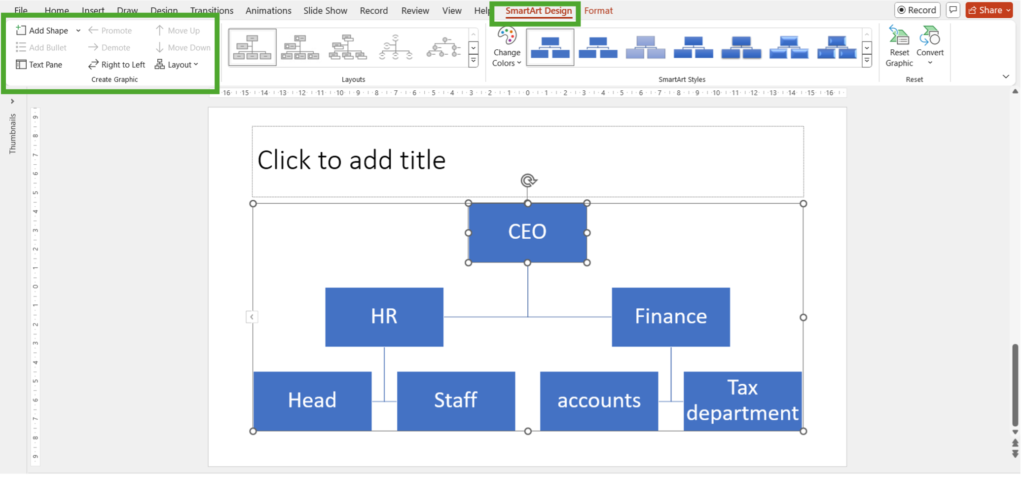
Method 1: Using the SmartArt Design Tab
Utilize the commands on the Design tab in the Create Graphic group. Just select the shape you want to modify, then choose the desired command.
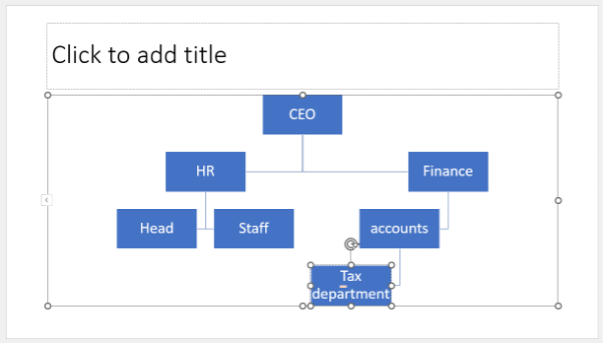
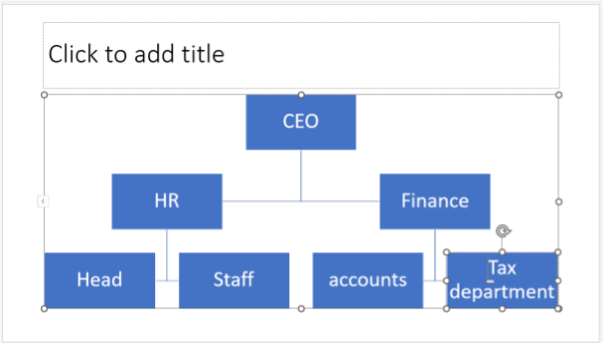
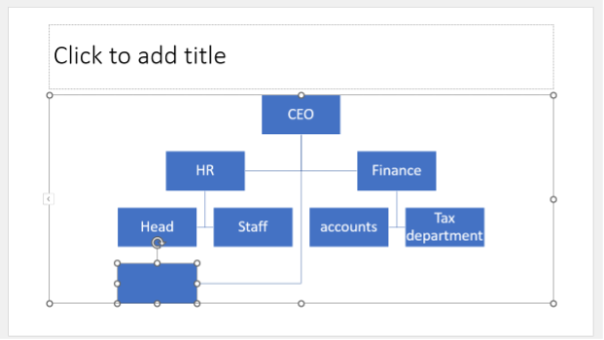
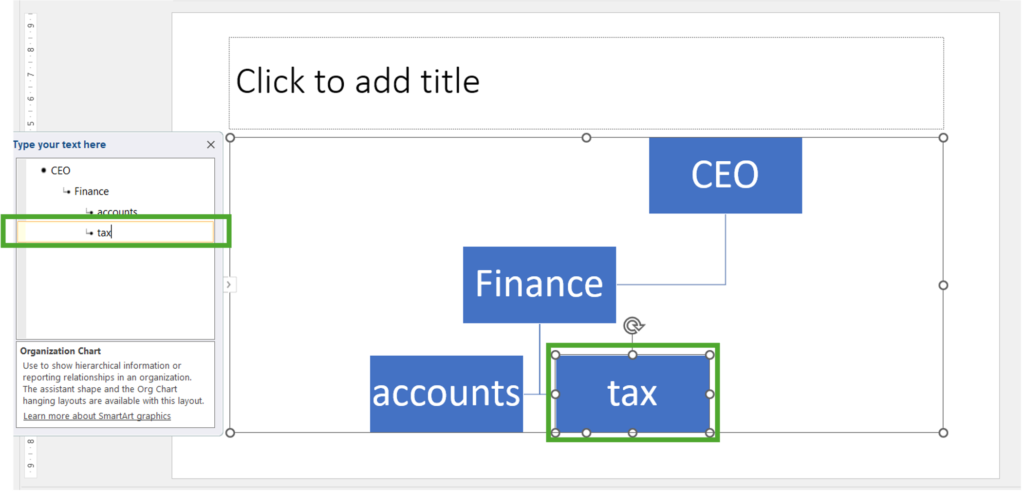
Demote a Shape: Select the shape you want to demote in the SmartArt graphic. Click on the Demote button in the Create Graphic group. The shape will move down one level. In the below illustration, we selected the Tax Department text box and pressed “Demote” button. As a result, the Tax Department box moved a level down below the Accounts text box.
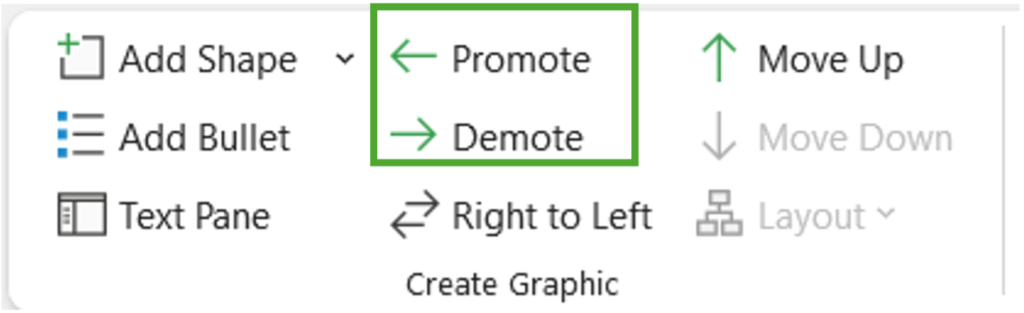
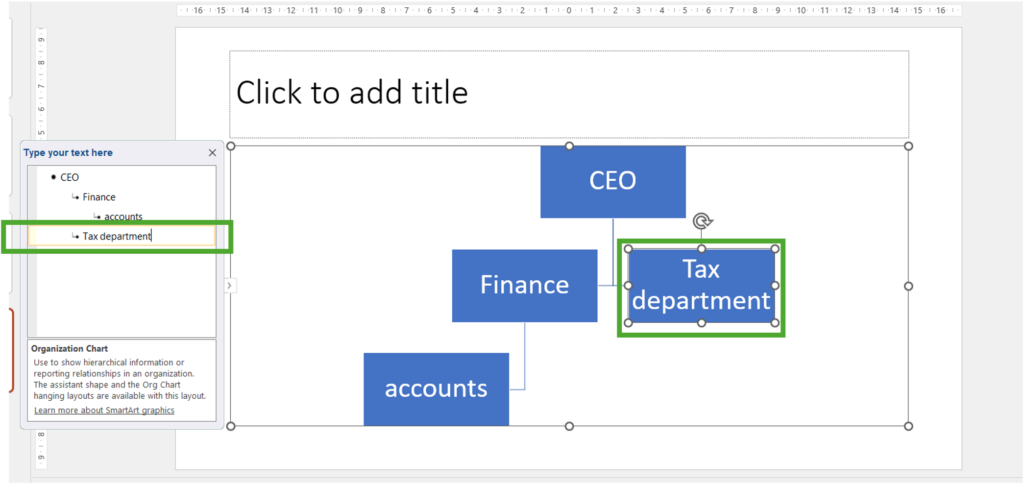
Promote a Shape: Select the shape you want to promote in the SmartArt graphic. Click on the Promote button in the Create Graphic group. The shape will move up one level. Now, if you press the Promote button on the Tax Department text box, it will go up by one level again.
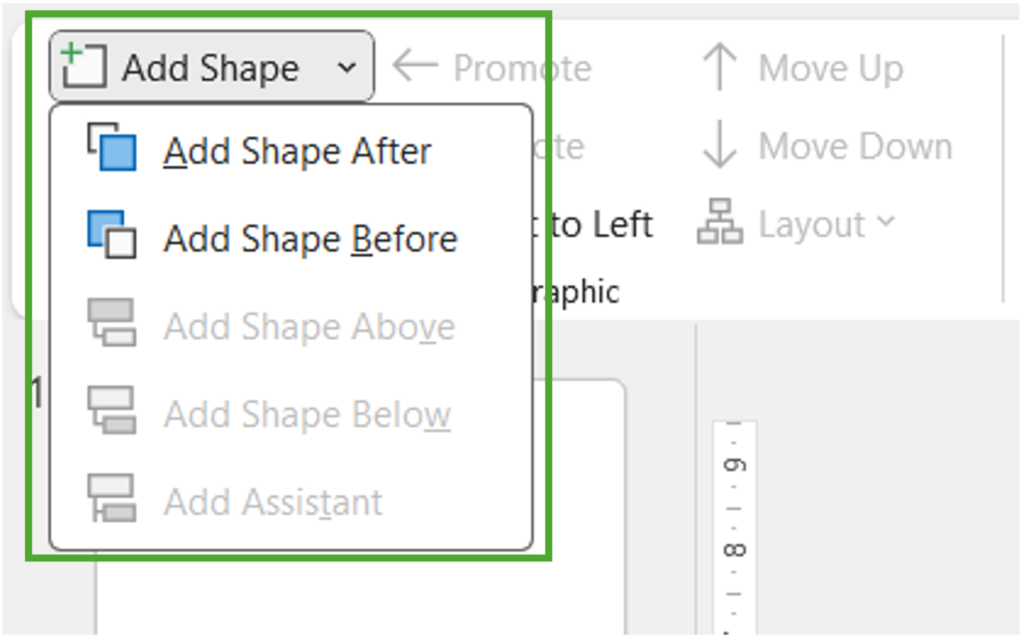
Add a Shape: Select the shape next to where you want to add a new shape in the SmartArt graphic. Click on the Add Shape button in the Create Graphic group. Choose where to add the shape (e.g., Add Shape After, Before, Above, Below, or Assistant).
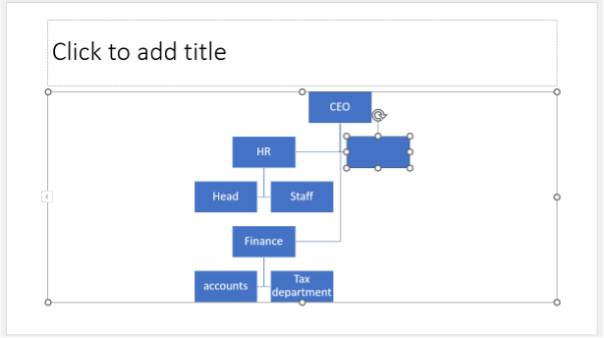
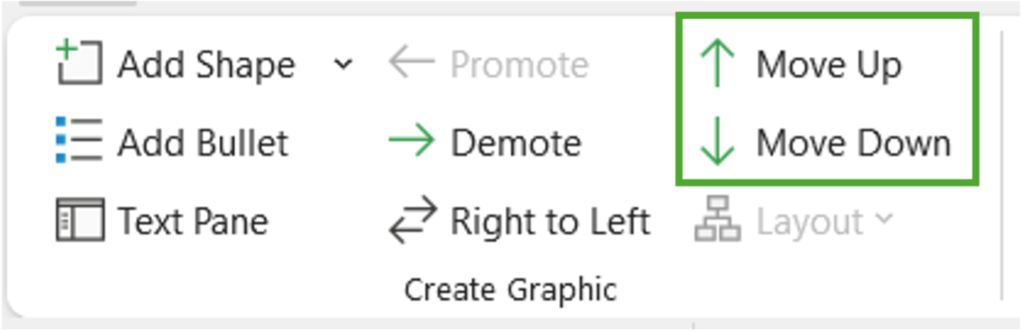
Move Up and Down: Select the shape and click on the Move Up or Move Down button in the Create Graphic Group. This will move the position of your shape up or down in the order of shapes at the same level.
(Used move down)
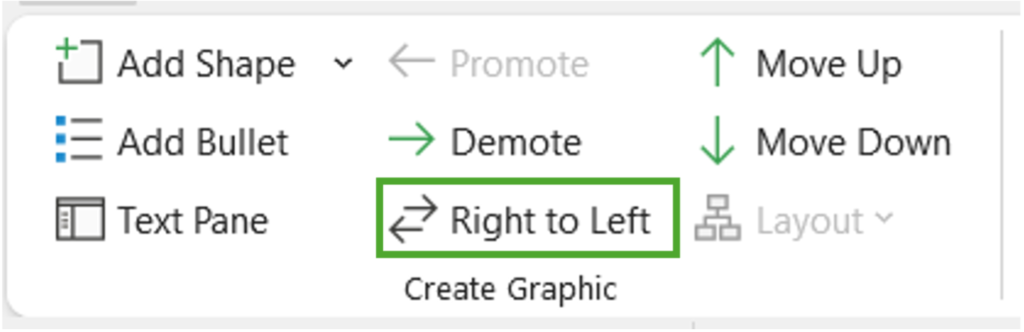
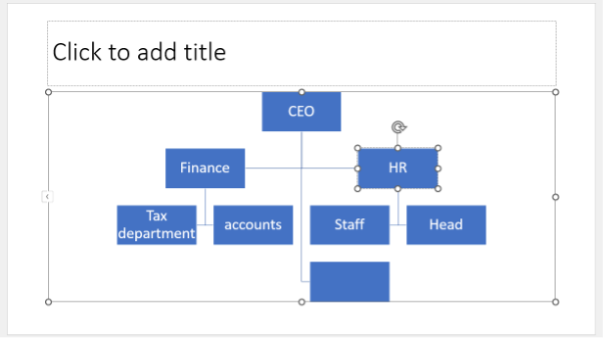
Right to Left: Click on your SmartArt Graphic and click on right to left and your design will switch from right to left and vice versa. In the illustration below, the Finance text box moved to the left and the HR text box moved to the right.
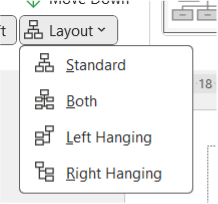
Layout: A diagramming or organizational chart tool allows users to choose how elements within the chart are arranged and displayed. It provides options for different structural orientations, such as standard hierarchical layouts, left or right-justified layouts, and balanced layouts with branches on both sides.
**
Method 2: Using Text Pane
Demote a shape: Select the desired bullet and press the Tab key. The bullet will move to the right, and the shape will move down one level.
Promote a shape: Select the desired bullet and press the Backspace key (or Shift+Tab). The bullet will move to the left and the shape will move up one level.
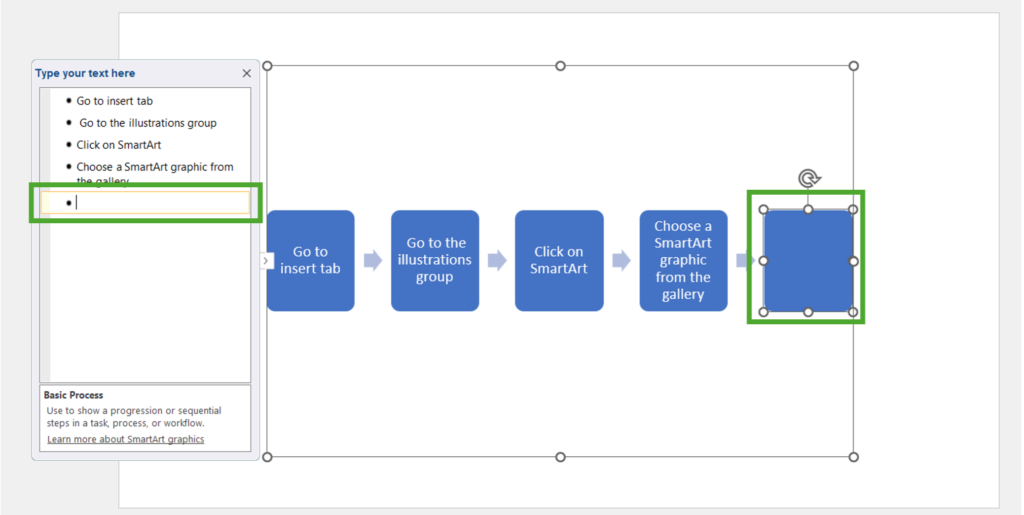
Add a new shape Place the insertion point after the desired bullet and press Enter. A new bullet will appear in the text pane, and a corresponding shape will be added to the graphic.
Remove a shape Select the bullet of the shape you want to delete and continue pressing Backspace until the bullet is deleted. The shape will be removed from the graphic.
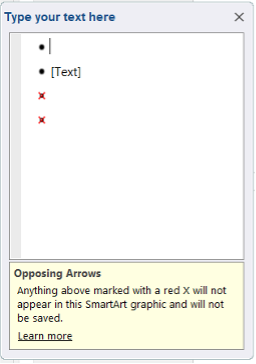
Pro tip: In SmartArt graphics that contain a fixed number of shapes, only some of the text in the Text pane appears in your SmartArt graphic. Text, pictures, or other content that is not displayed is identified in the Text pane with a red X. This content is still available if you switch to another layout, but if you keep and close this same layout, the information is not saved, to protect your privacy.
**
Customizing SmartArt Graphics (SmartArt Design Tab)
SmartArt Design Tab: Select the shape you want to demote in the SmartArt graphic. Go to the Design tab under SmartArt Tools.
Layouts Group
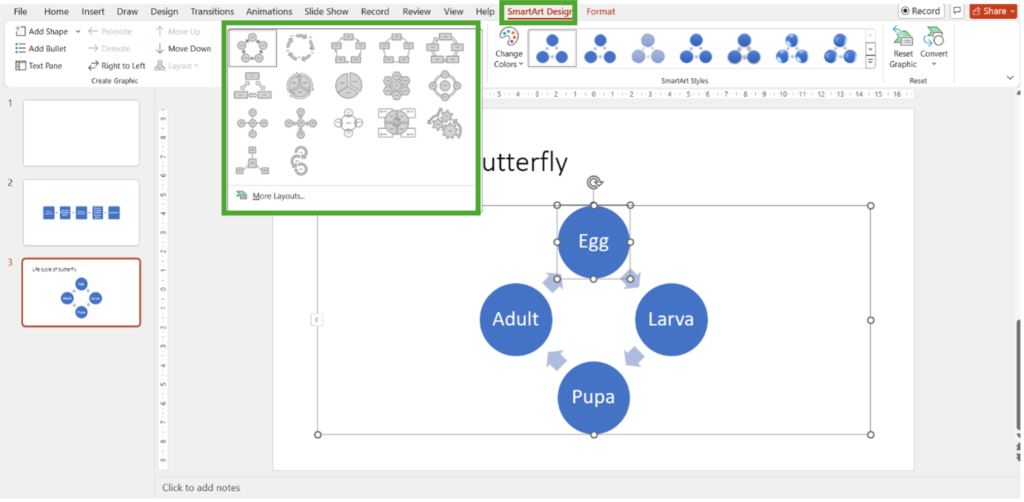
More Layouts: Opens a dialog box with additional SmartArt layout options.
SmartArt Styles Group
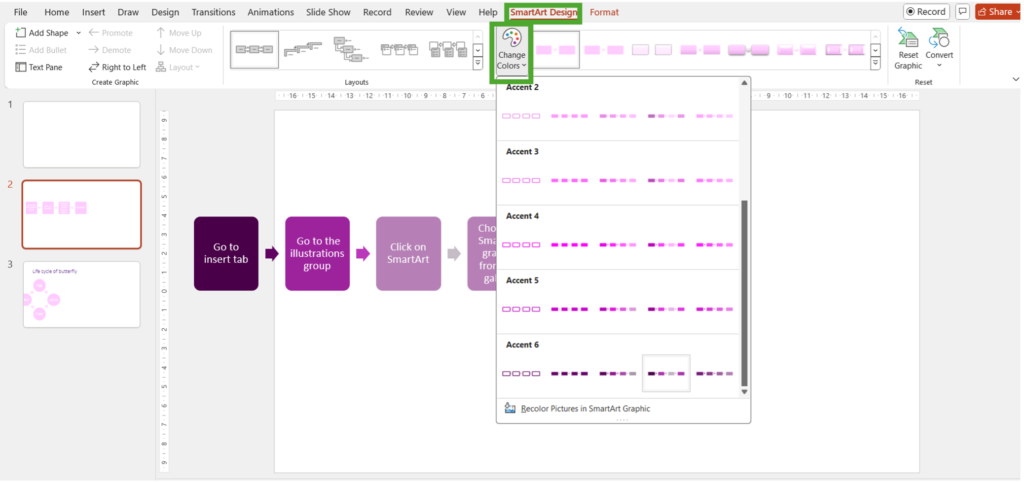
- Change Colors: Opens a menu to change the color scheme of the entire SmartArt graphic.
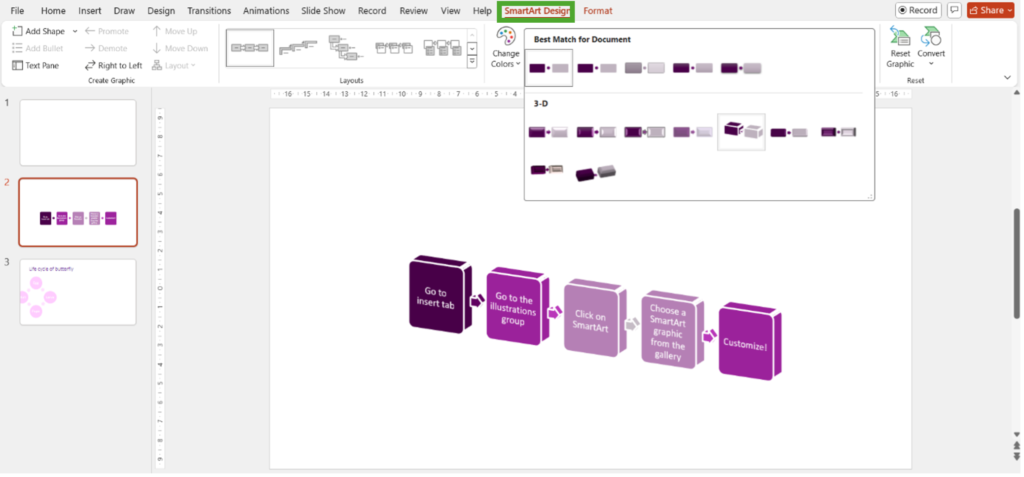
- SmartArt Styles: Applies a predefined style to the entire SmartArt graphic.
Reset Group
- Reset Graphic: Resets the SmartArt graphic to its default layout and removes any custom formatting or changes.
- Convert: Converts the SmartArt graphic into text or individual shapes. This allows for further customization and editing, making it more flexible and accessible. You can:
- Convert to Text: Transform the SmartArt back into plain text, ideal for simpler presentations.

- Convert to Shapes: Change the SmartArt elements into individual shapes that can be independently edited and customized.
Styles and Effects (Format Tab)
The Format tab under SmartArt Tools provides various customization options to enhance the appearance of your SmartArt graphic:
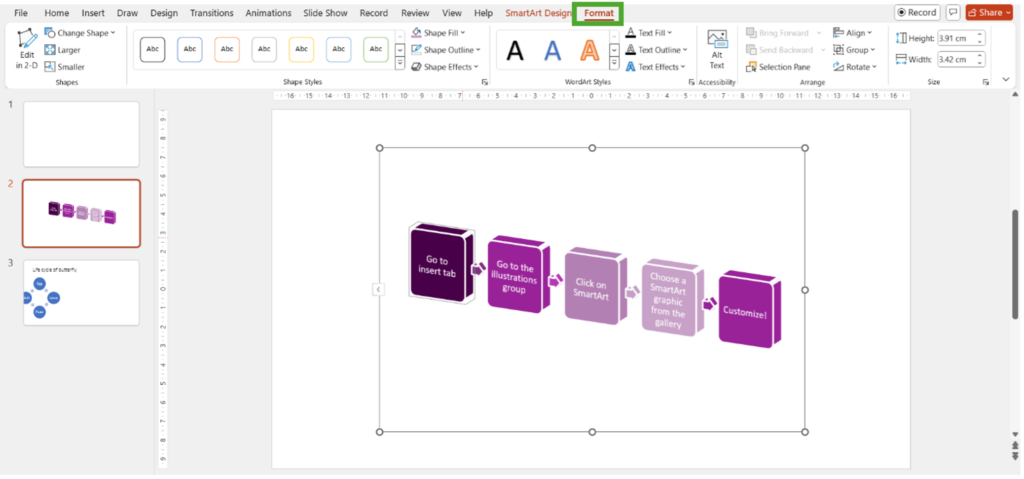
Shapes Group:
- Change Shape: Switch to a different shape type.
- Larger/Smaller: Adjust the size of the selected shape.
Shape Styles Group:
- Shape Fill: Change the fill color.
- Shape Outline: Customize the outline color, weight, and style.
- Shape Effects: Apply effects like shadows, reflections, glows, and 3-D rotations.
- Quick Styles: Apply predefined styles combining fill, outline, and effects.
WordArt Styles Group:
- Text Fill: Change the text color.
- Text Outline: Customize the text outline color and weight.
- Text Effects: Apply effects to the text, such as shadows and glows.
- Quick Styles: Apply predefined text styles.
Arrange Group:
- Bring Forward/Send Backward: Adjust the stacking order of shapes.
- Bring to Front/Send to Back: Move shapes to the front or back.
- Selection Pane: Manage all objects on the slide.
- Align: Align shapes and distribute them evenly.
- Group/Ungroup: Group multiple shapes or ungroup them for individual editing.
- Rotate: Rotate or flip shapes.
Size Group:
- Shape Height/Width: Adjust the height and width of shapes.
- Scale: Proportionally resize shapes.
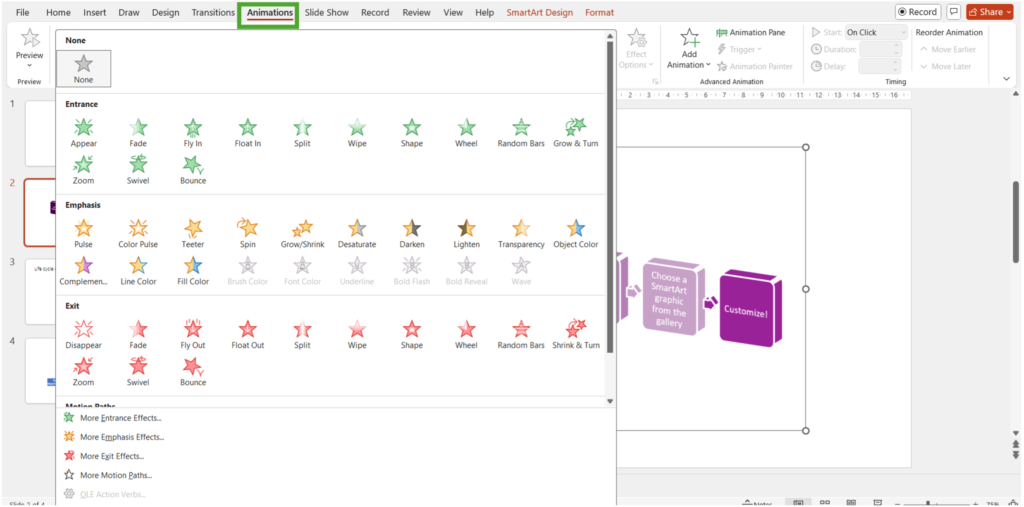
Animating a SmartArt
Animating SmartArt in PowerPoint can help make your presentation moreengaging. Here are the steps to animate a SmartArt graphic:
- Click on the SmartArt graphic you want to animate.
- Go to the “Animations” tab.
- In the Animation group, select the animation effect you want. You can select More to see more choices. (To remove the animation, just select None from the gallery of animation options.)
Animate objects individually
1. With the SmartArt still selected, click on “Effect Options”
2. Choose how you want the SmartArt elements to be animated. Options might include “As One Object”, “All at Once”, “One by One”, or “Level by Level”.
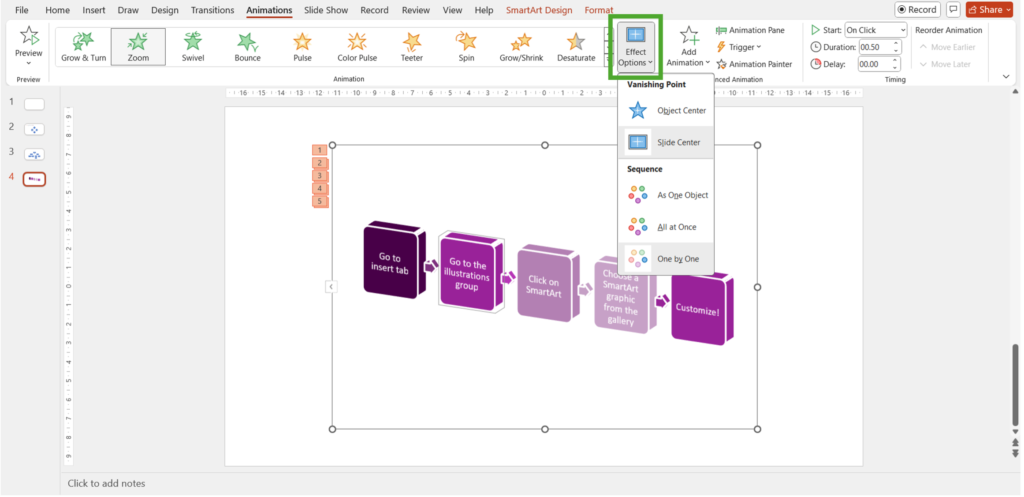
3. Click “Animation Pane” to open the Animation Pane on the right side of the screen.
4. In the Animation Pane, you can reorder animations, adjust start times, and change durations.

5. Click “Preview” in the “Animations” tab to see how your animation will look during the presentation.
(we selected one by one object in the above animation illustration for the SmartArt)
Conclusion
Incorporating SmartArt into your PowerPoint presentations is a game-changer for creating engaging and visually appealing slides. By leveraging the intuitive tools available in both the Design and Format tabs, you can easily transform ordinary bullet points into dynamic graphics that captivate your audience. Whether you’re looking to streamline your information, add a splash of creativity, or simply make your slides look more polished, SmartArt offers the perfect solution. So, embrace these features and elevate your presentations from mundane to magnificent—your audience will thank you!

