
Introduction:
Microsoft PowerPoint is a robust software that enables users to create captivating and interactive presentations. While most users are familiar with its basic features, many are unaware of the advanced capabilities that can take presentations to the next level. In this article, we will learn how to make stunning animations in MS PowerPoint.
Understanding Animations in PowerPoint:
Animation in PowerPoint refers to the movement or transition effects applied to text, images, shapes, and other objects within slides. These animations can add visual interest, emphasise key points, and create a more engaging presentation experience. PowerPoint offers different animation options like entrance, emphasis, exit, and motion path effects.
Getting Started with Animations in PowerPoint
To begin animating objects in PowerPoint, open your presentation and navigate to the slide containing the object you want to animate. Select the object by clicking on it, then navigate to the “Animations” tab in the PowerPoint ribbon.

By clicking the Animations Tab, the Animation Ribbion opens, showing different groups under the Animation Tab.

By selecting the object you want to animate, we can activate all the animation options in the Animation Ribbon.

In the Animation Ribbon, under Animation Group. We can see all the different types of animations we can apply to our selected object.

And by clicking the dropdown button on the Animation Group, we get to explore even more types of animation options.

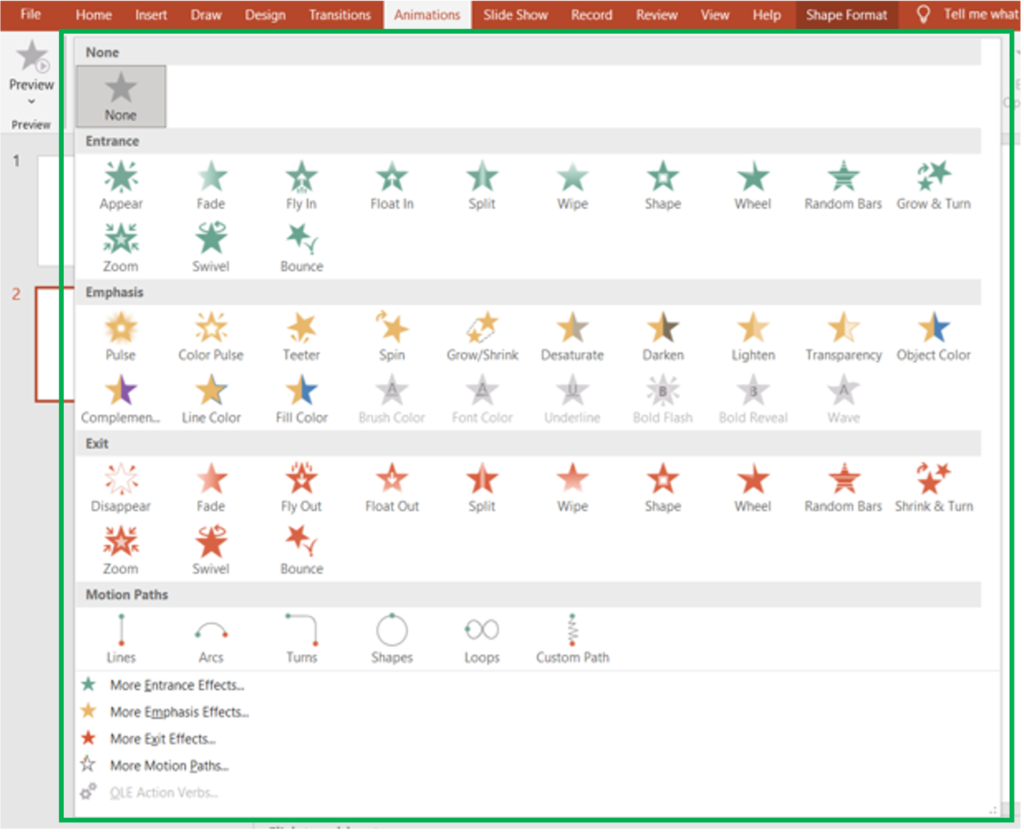
In the dropdown Animation Panel, we can see a variety of Animations like Entrance, Emphasis, Exit, Motion Paths and None.
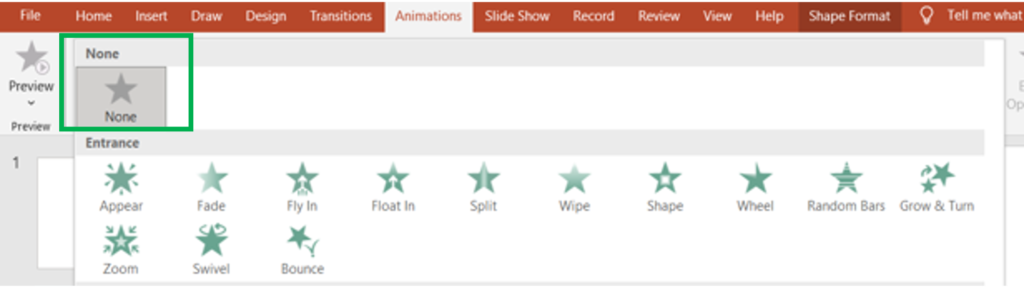
None
None in the Animation Panel shows that the object we have selected has no animation set on it.
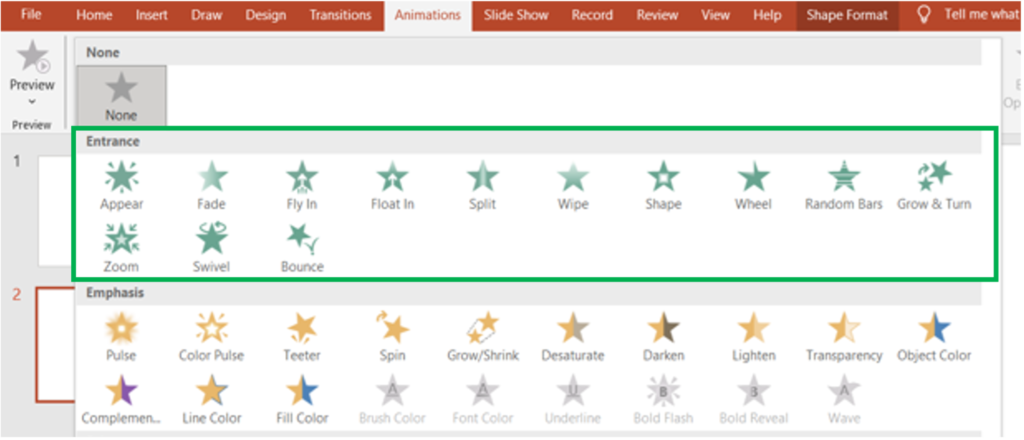
Entrance Animations in PowerPoint
Entrance animations are used to introduce objects onto a PowerPoint slide . To apply Entrance Animation to an object, first select the object. Then click the Animations Tab. Under the Animations Tab, we have to click the drop-down button in the Animations Group. In the drop-down panel, we get to see multiple Entrance Animations such as “Appear”, “Fade,” “Fly-In,”, “Float In”, “Split”, “Zoom”, etc.
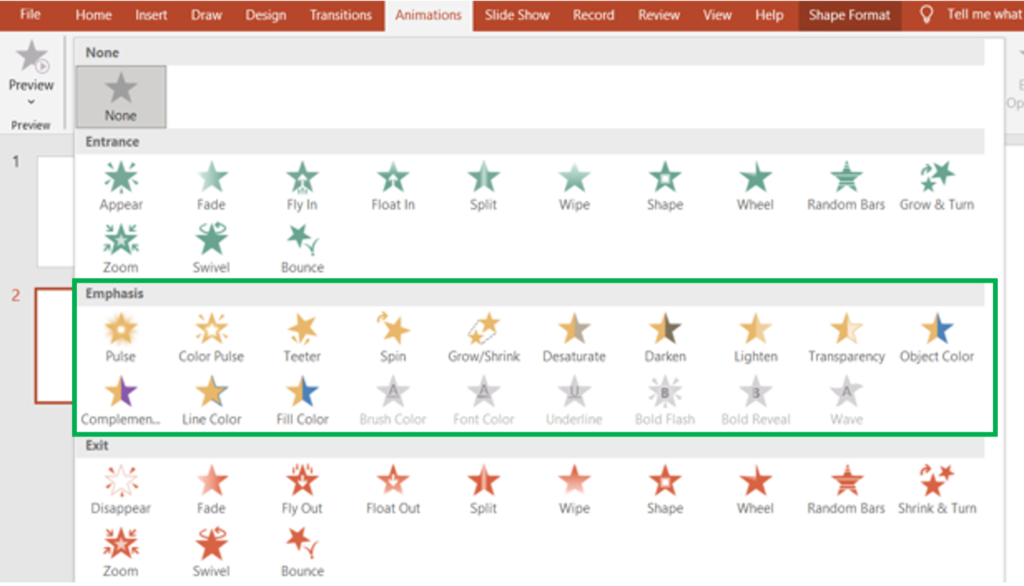
Emphasis Animations
Emphasis animations draw attention to specific objects or text within a slide. To apply an emphasis animation select the object you want to animate. Below the Entrance, we can find the Emphasis Animations list in the Animation’s group drop-down list.
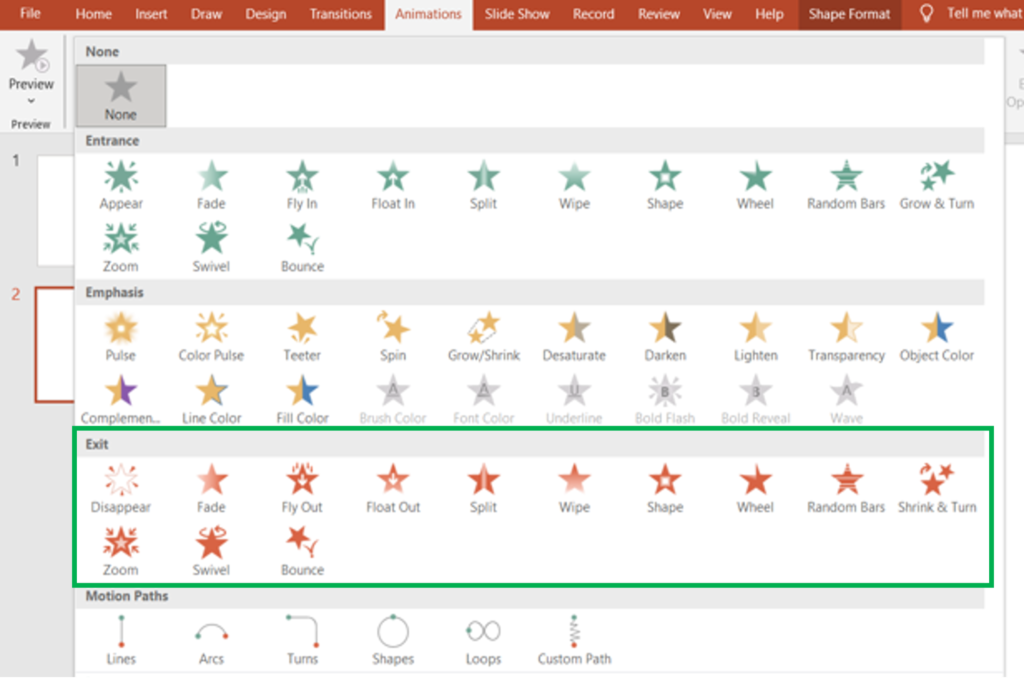
Exit Animations
Exit animations are used to remove objects from the slide. To apply Exit Animation to an object, first select the object. Then click the Animations Tab. Under the Animations Tab, we have to click the drop-down button in the Animations Group. In the drop-down panel, we get to see numerous Exit Animations such as “Disappear”, “Fade”, “Fly Out,” “Split”, “Zoom”, etc.
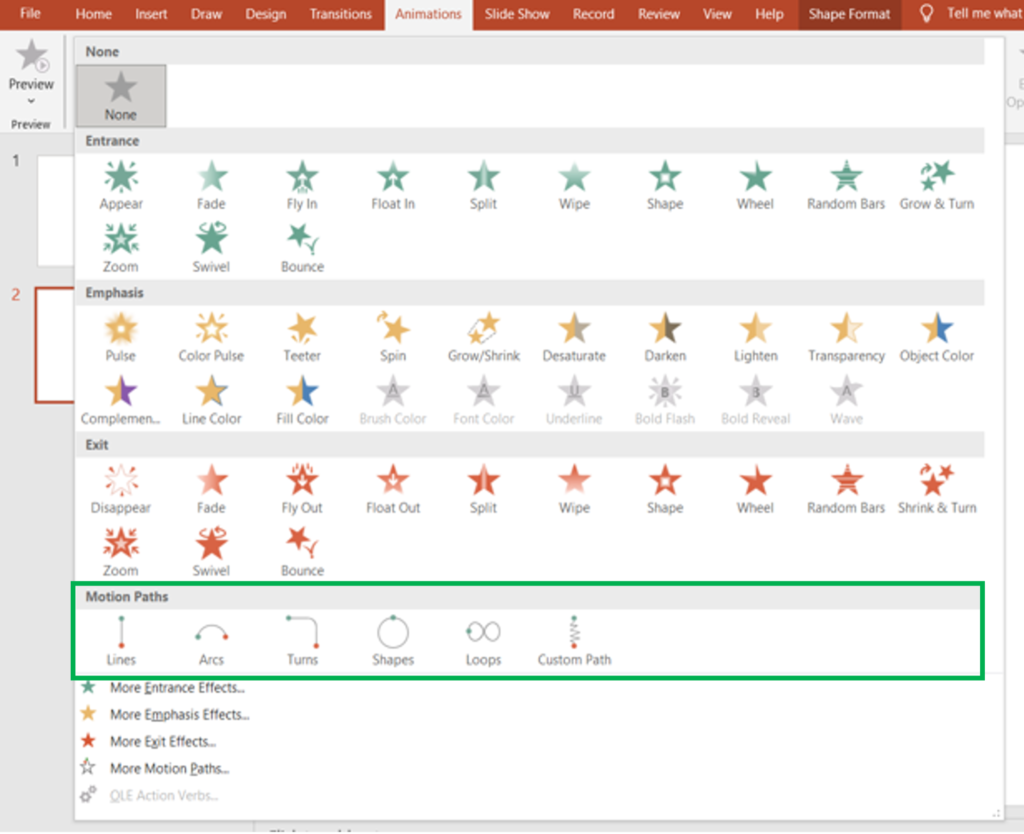
Motion Path Animations
Motion path animations allow them to move objects along a specified path on the slide. To apply a Motion Path animation select the object you want to animate. Below the Exit Animation list, we can find the Motion Path Animations.
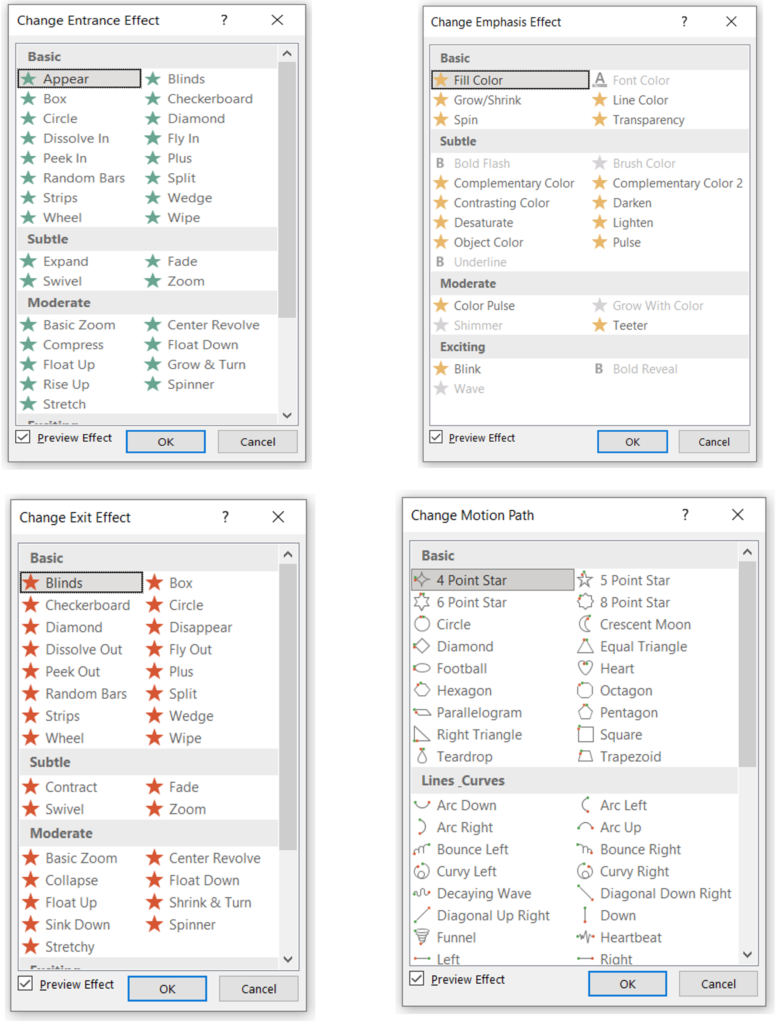
MS PowerPoint gives more Entrance, Emphasis, Exit and Motion Path Effects to apply to the object. Under the Motion Path Effect list, you can see more options for these effects.
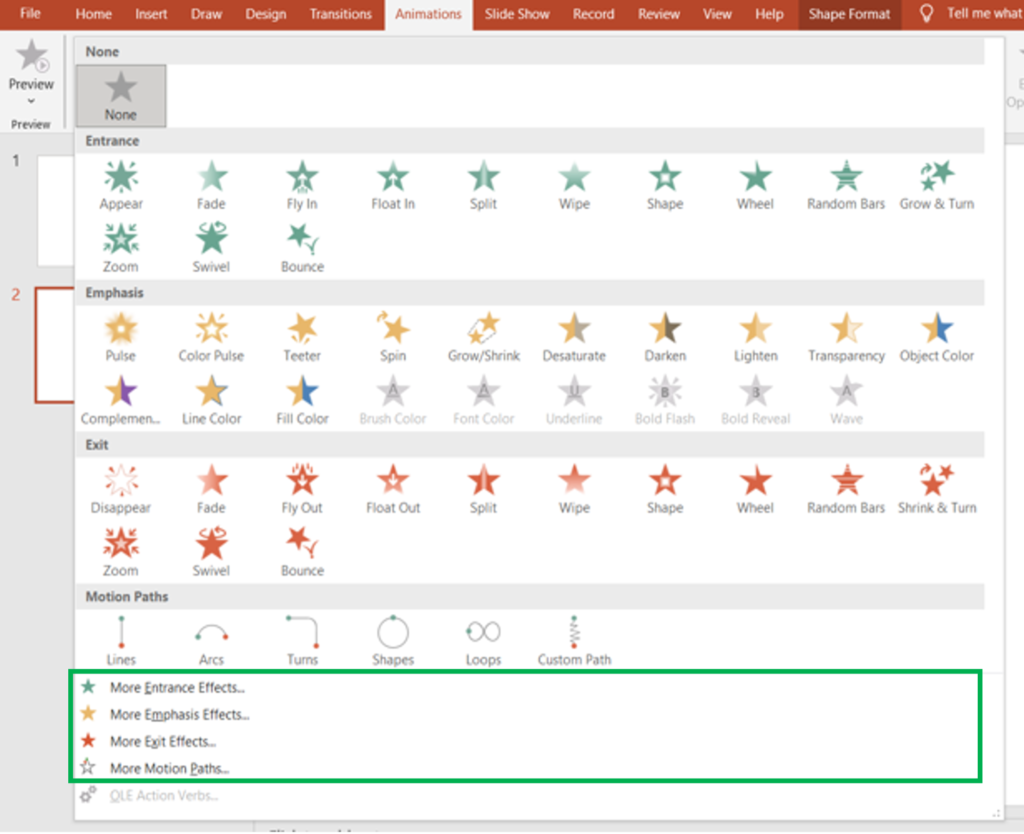
By clicking them we get a Panel related to each effect, from which we can choose our desired Animation Effect.
Effect Options
Effect Options is a setting in MS PowerPoint that allows us to modify the movement of the selected animation. When we apply the Animation Effect to an object we get access to the Effect Option. It is located beside the Animation Effect Group on the Animation Ribbon.
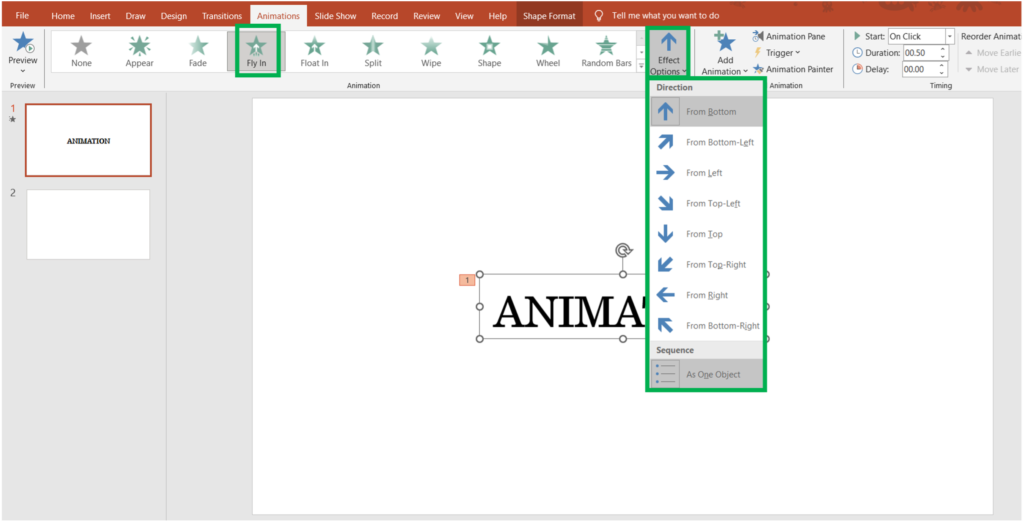
We can see that when we select the “Fly-In” Entrance Animation Effect, the Effect Options box on the right gets activated. By clicking the drop-down arrow we get a list of directions from where the Fly-In animation can enter the slide.
Most of the Animation Effects offer variations through Effect Options but a few allow us to set a sequence of the animations. The Animation Effects like Appear, Fade, Grow& Turn, Swivel, and Bounce in Entrance Effect.
The Emphasis group includes Pulse, Teeter, Desaturate, Darken, Lighten, Complement, Underline, Bold Flash, Bold Reveal, and Wave animation effects.
Disappear, Fade, Shrink & Turn, Swivel and Bounde under Exit Animation Effects are restricted to setting a sequence only.
Under the Emphasis group animation effects like Object Colour, Line Colour, Fill Colour, Brush Colour, and Font Colour allow us to play with colours to make our animations in PowerPoint Presentations even more stunning.
Add Animation
If you want to add multiple animations to the selected object we use the Add Animations Option available on the Animation Ribbon.
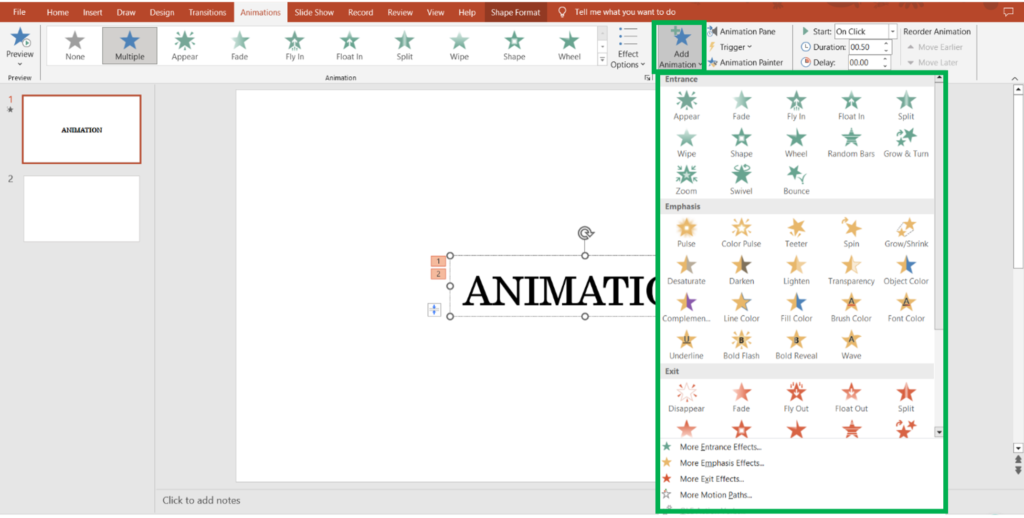
When we add multiple animations to an object we can see numbers appear on the top left corner of the object when we select it. The numbers show the sequence in which the Animation Effect has been applied. These numbers also allow you to check which animation effect you have chosen for the object.
Trigger:
The Trigger option present in the Advanced Animations Group helps us set conditions for the initiation of the animation. When you set Trigger on an object, you can start the animation only by clicking on the object.
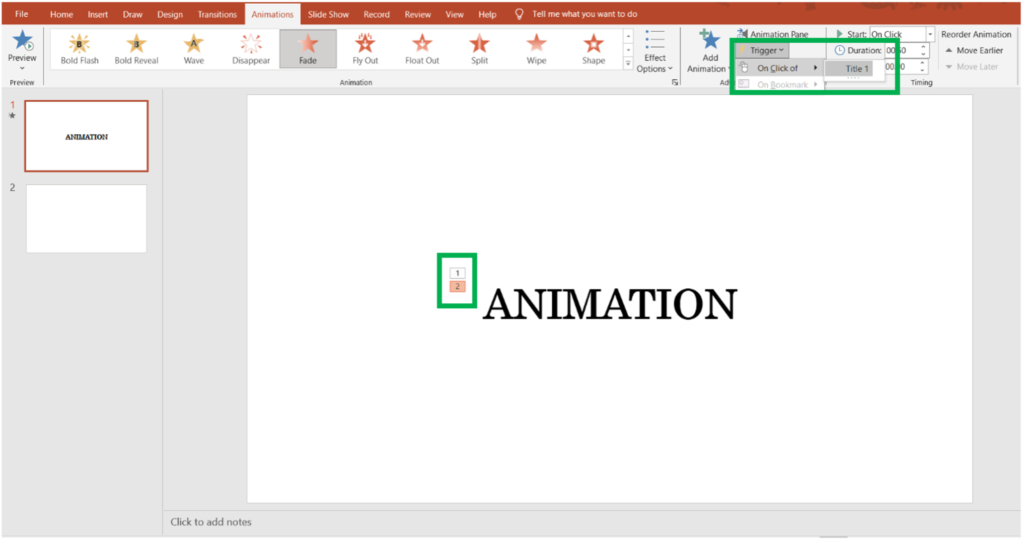
First, we have to select the object to activate the animation tab. Then select the animation effect on which you want to set the Trigger. For this case, we are using Trigger for 2nd Animation Effect. Then click on Trigger and go to “On Click of”. This will ensure that the animation effect takes place only when you click on the object. Then select your Animation Object here it’s “Title 1”.
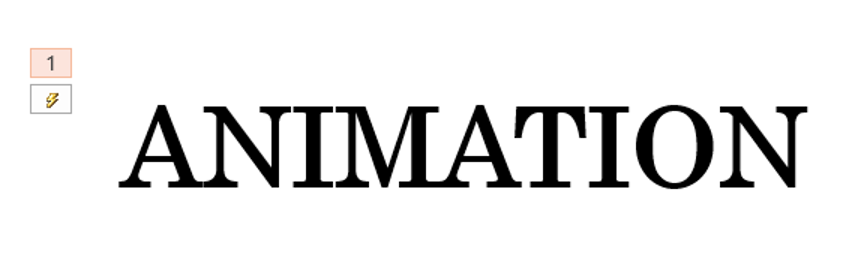
When you apply Trigger on the Animation Effect a Lighting Bolt icon appears on the sequence number with the Trigger Animation.
To undo the Trigger we select the object, go to the Trigger, press “On Click of” and uncheck the selected object.
Animation Pane:
The Animation Pane displays the list of all the animated objects present on the slide. It helps you to organise the sequence of all the animations.
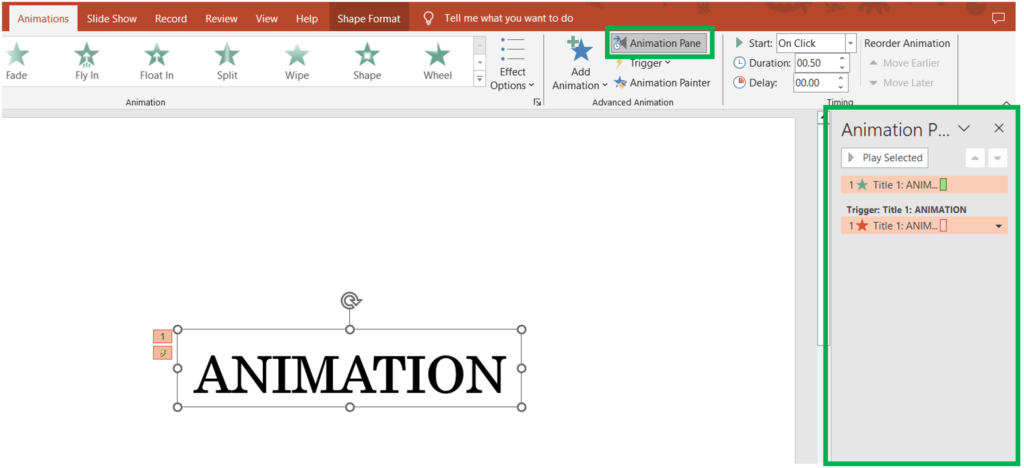
On the slide, we have one animation object and two animation effects applied to the same object. It can be seen on the right-hand side of the Animation Pane window.
Timing Group : The Timing group in the Animation Tab allows you to control the timing and duration of the animation effect applied to the objects. This group contains various options that determine when animations start, how long they last, and the order in which they occur during a slideshow.
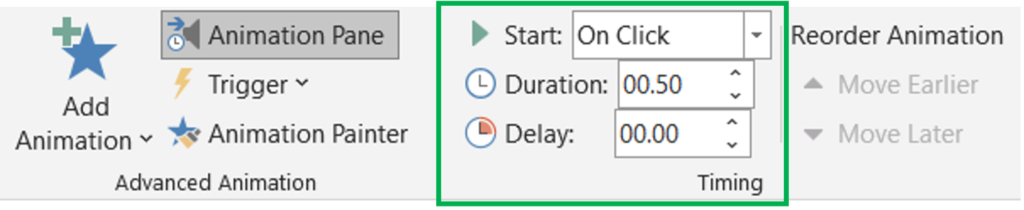
Start: It determines when the animation effect begins relative to the other events in the slideshow. MS PowerPoint offers three options:
- On Click: The animation starts when the user clicks the mouse or presses a key during the slideshow.
- With Previous: The animation starts simultaneously with the previous animation effect on the slide.
- After Previous: The animation starts immediately after the previous effect finishes.
Duration: Duration helps you to set the length of the animation effect.
Delay: Delay specifies the time between the slide transition’s start and the animation effect’s beginning. It helps us to pause before the animation begins.
We have looked at Animation tools like Animation Effects, Additional Effects, their timing, sequence, etc. With the help of these animation tools, we can build stunning presentations which can help us effectively communicate the message to the audience.
Conclusion
Mastering animations in PowerPoint is essential for creating engaging and impactful presentations. By understanding different animation effects and techniques offered in MS PowerPoint, you can effectively communicate your message to the onlookers. Whether you’re presenting financial data, sales projections, or marketing strategies, animation can elevate your presentation to the next level. With practice and experiment with different effects, timings, and sequences we can find the perfect animation style for our content.

