
Need to share your PowerPoint slides with colleagues, clients, or on social media? This is when trying to export your presentation in the right format can make a huge difference in how it’s viewed, shared, and understood. In this guide, we’ll cover why exporting is essential, how to choose the right format, and step-by-step instructions on exporting your presentation with ease.
Why Export Your Presentation?
Exporting your presentation isn’t just about saving it in a different format; it’s about enhancing its accessibility and impact. Here are some reasons why exporting your presentation matters:
- Easy Sharing: Exporting allows you to share your presentation in formats that don’t require PowerPoint to view.
- Better Compatibility: Different formats ensure your presentation looks consistent across all devices.
- Improved Accessibility: Formats like PDFs are easily accessible and can be opened on almost any device, while videos can add a self-running narrative touch.
Choosing the Right Format (elaborate and use cases)
When it comes to exporting your presentation, selecting the correct format is key.
1. PDF: PDFs can be opened on virtually any device, regardless of the software or operating system, ensuring a consistent viewing experience. The document retains its original formatting, ensuring that fonts, layouts, and images appear exactly as intended, even on different devices.
It is ideal when you need to share slides as static handouts for meetings, workshops, or lectures. It can be quickly emailed or uploaded to file-sharing platforms, where recipients can view or print the slides at their convenience.
2. MP4 Video: Exporting your presentation as an MP4 video brings it to life by preserving animations, transitions, and multimedia elements like videos or narrations. This makes it more engaging for viewers.
MP4 videos are great for hands-off presentations that run by themselves, such as for virtual conferences, webinars, or kiosks. MP4 is a widely supported video format, making it easy to upload to video-sharing platforms like YouTube, Vimeo, or social media channels. This is ideal for expanding your audience reach.
3. Images (JPEG/PNG): Exporting slides as images (JPEG or PNG) creates lightweight files that are easy to share, embed, and post on different platforms. JPEG and PNG files can be viewed on virtually any device and software, making them highly versatile. Once exported as images, you can easily use them in other software like Photoshop or Canva to enhance or repurpose the content for other materials.
If you want to share specific slides (such as infographics, charts, or quotes) on platforms like Instagram, Twitter, or LinkedIn, JPEG or PNG files are ideal for quick, shareable content.
4. PowerPoint Show (.ppsx): A .ppsx file opens directly in slideshow mode, bypassing the editing interface of PowerPoint. This provides a more polished and immersive experience for viewers.Unlike PDFs or images, .ppsx files retain interactive features like embedded videos, hyperlinks, animations, and transitions. .ppsx files tend to be smaller than video formats, making them easier to share via email or online platforms.
When you want to provide a professional, distraction-free viewing experience, especially for clients or stakeholders, .ppsx ensures they only see the slideshow, not the PowerPoint editing window.
Step-by-Step Guide on how to Export Your Presentation
1. How To Export Your Presentation As a PDF
PDFs are excellent for sharing clean, static versions of your slides.
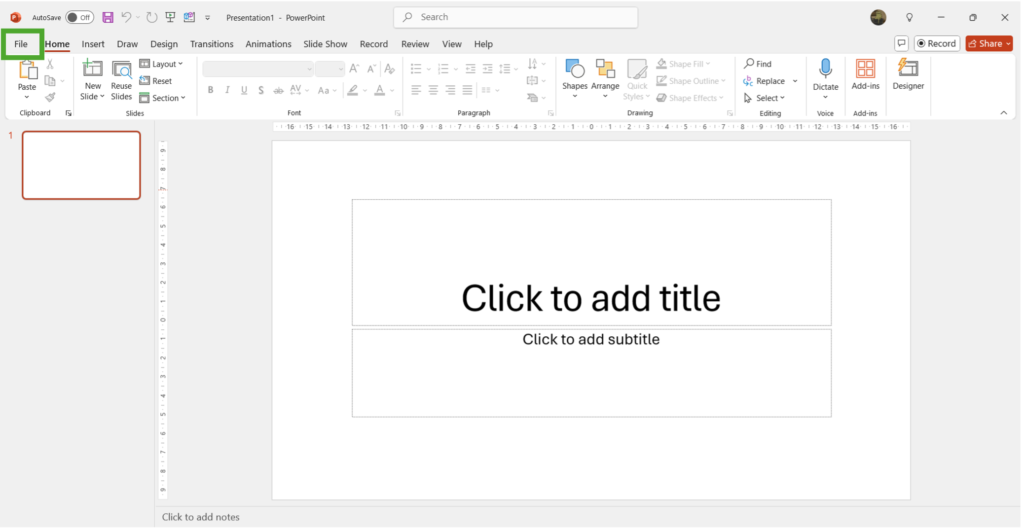
Step 1: Click on ‘File’ in the top menu.

Step 2: Select ‘Export’ from the dropdown. Click ‘Create PDF/XPS Document’
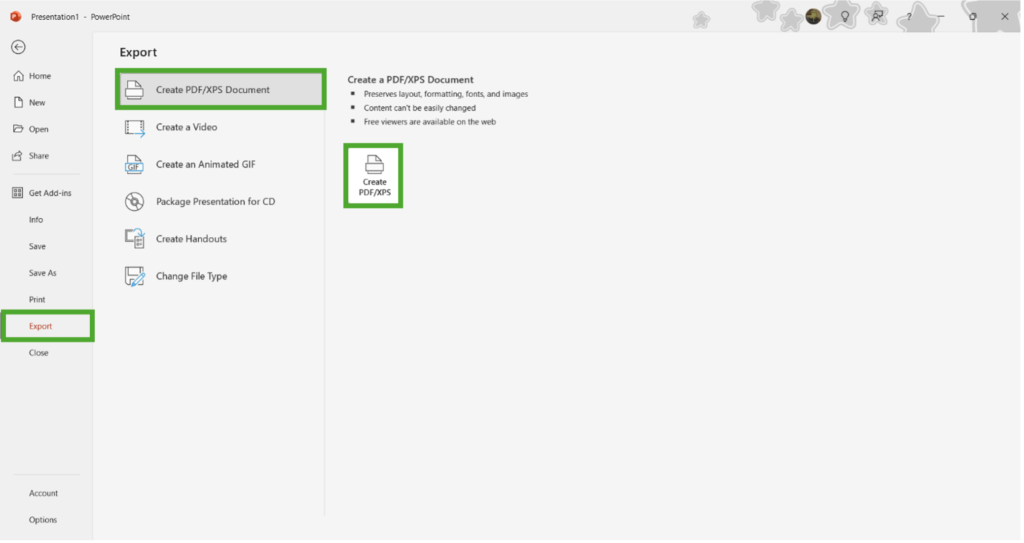
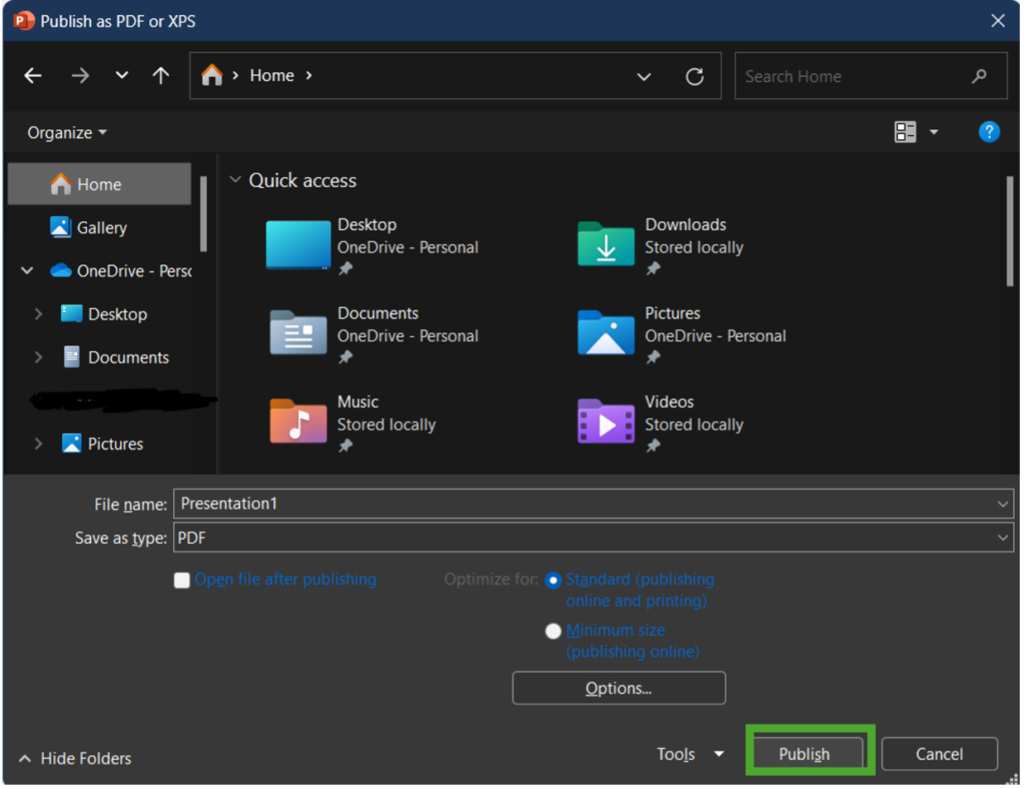
Step 3: Click on ‘Publish’.
**
2. How To Export Your Presentation as a Video (MP4)
Converting your presentation into a video can make it more dynamic, especially when you add narrations or animations.
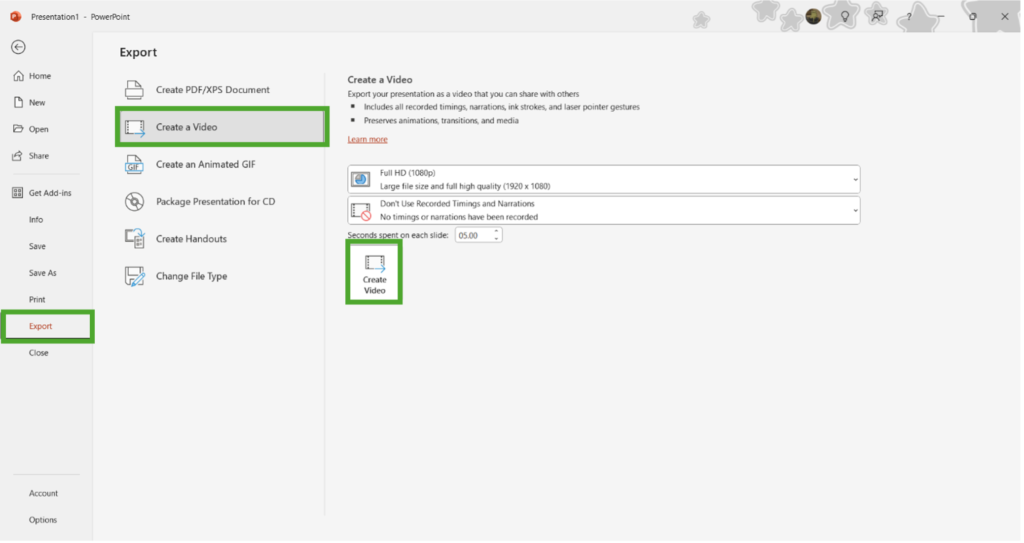
Step 1: Click on ‘File’

Step 2: Click on ‘Export’ and choose ‘Create a Video’.
Step 3: Adjust the video quality and timing settings.
Step 4: Click ‘Create Video’, then choose where to save it.
Watch this short video to see how the presentation plays as a video. Based on the seconds spent on each slide in the video settings saved above, the slides transition from one to another.

(presentation exported as a video)
**
3. How To Export Your Presentation Slides as Images (JPEG/PNG)
Exporting slides as images is perfect for sharing visually rich content on platforms like Instagram or embedding them into other documents.
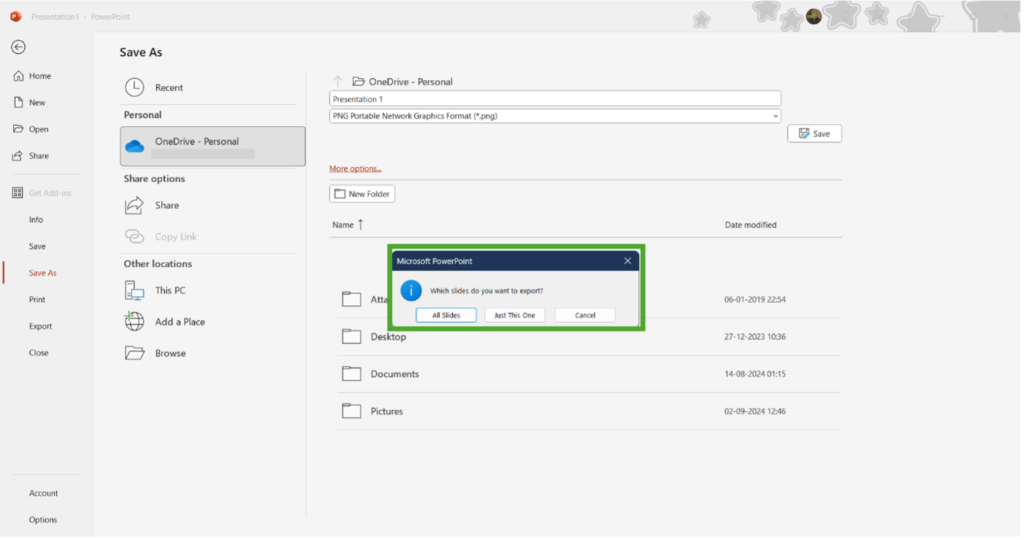
Step 1: Click on ‘File’.

Step 2: Click on ‘Save As’ and choose JPEG or PNG from the file type dropdown.
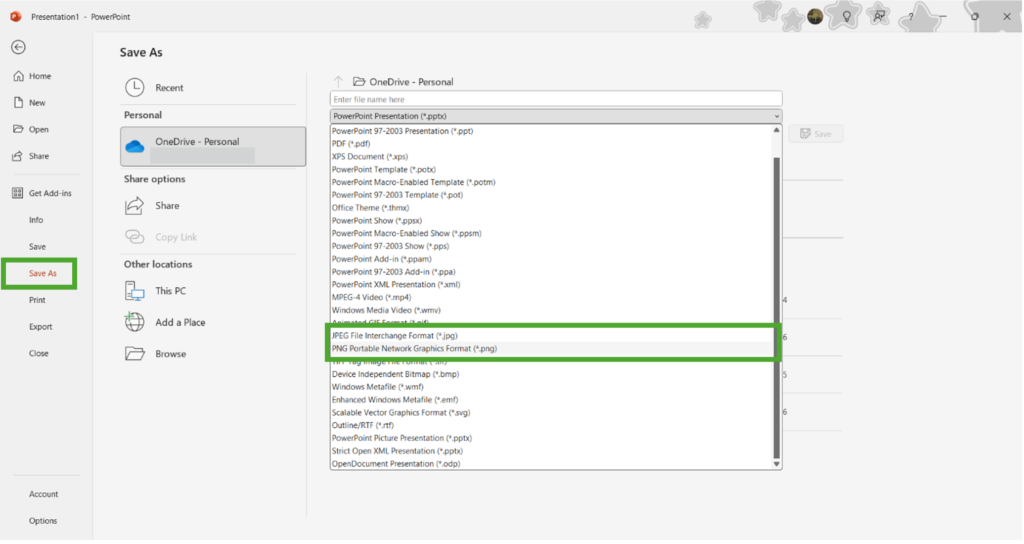
Step 3: Choose whether to save all slides or just the current one.
Tip: Use PNG for higher quality and better clarity, especially for graphics or detailed slides.
**
4. Exporting as PowerPoint Show (.ppsx)
A PowerPoint Show file opens directly in slideshow mode, making it ideal for a polished presentation experience.
Step 1: Click on ‘File’ .
Step 2: Click on ‘Save As’ and select ‘PowerPoint Show (.ppsx)’ as the file type.

Step 3: Save your file and share it with your audience.
Benefit: This format removes the need for users to click ‘Start Slide Show’ and instead launches directly.
Conclusion
Trying to export your presentation correctly ensures that your hard work is displayed beautifully and effectively, no matter the format. Whether you’re creating a handout, a video tutorial, or a quick image for social media, knowing how to export can elevate your presentation skills to the next level. Try these methods and see the difference it makes!

