
Excel Automation – Creating an Index sheet in a Workbook
You may have worked on an Excel workbook with just 3 or 4 worksheets in them.
In those workbooks, navigating between worksheets is relatively easy.
Right?
But what if you are working with a humongous dataset with 20 or 40 may be 100 worksheets in the Excel workbook?
What do you do then?
Navigating to the middle sheets or sheets at the end can be a very tedious and time-consuming process.
Isn’t it?
Yes.
Well, in those cases, it is best to create an Index Sheet upfront with a list of all the sheets in the workbook.
Any user can go to any of the sheet in the workbook by clicking on the corresponding index link of that particular worksheet.
But creating this index sheet manually is also an uphill task.
Yeah it is!
Well, you are in luck.
You don’t need to manually create a link to each of the sheet in the workbook.
Instead you can just create it automatically using a macro.
But you don’t know about programming also.
How do you write a macro code for this automation?
Don’t worry don’t worry!
We are still here.
Let us show you how you can create this automated index sheet through an easily available macro code.
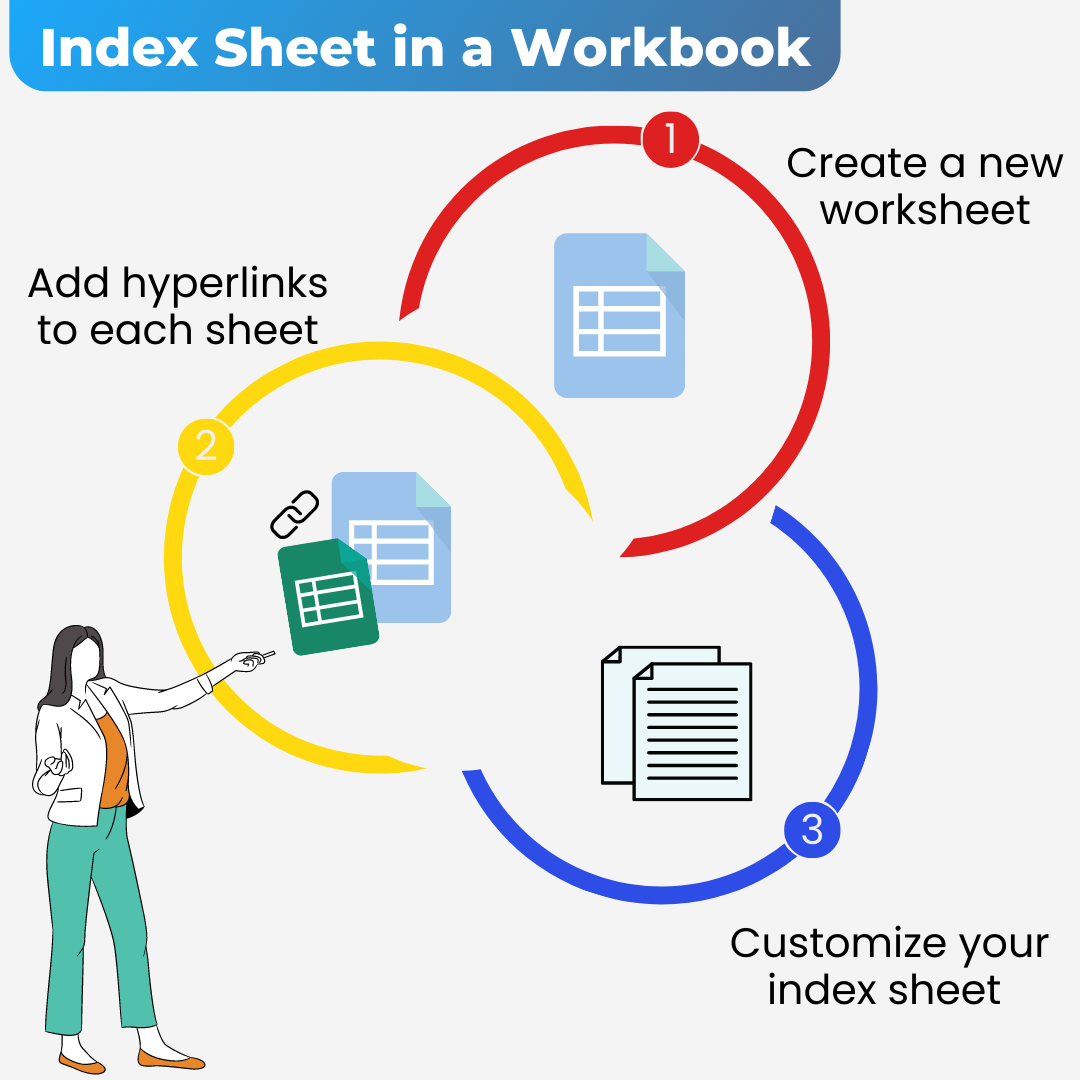
Just follow these simple steps below:
Step 1:
Open an Excel workbook that has multiple sheets. Create a new sheet at the front of the workbook and name it “Index Sheet” or anything else you may want. Also, you can format this sheet to put serial numbers if you know the exact number of sheets in the workbook.

Step 2:
Go to the Views tab. Click on the Macros drop down and select View Macros. A macro dialog box opens up.
Step 3:
Let us name the macro in the Macro name option in the macro dialog box. For example, we name the macro name is “CreateIndex”. Once done, Click on Create button.
Step 4:
The macro editor box opens up. There are 2 lines of code already which indicate the macro name is “CreateIndex”. Any code that we write within these 2 lines will become part of the “CreateIndex” macro.
Step 5:
Simply Copy and Paste the below code within the 2 lines of code in the Macro Editor.
Dim sh As Worksheet
Dim cell As Range
For Each sh In ActiveWorkbook.Worksheets
If ActiveSheet.Name <> sh.Name Then
ActiveCell.Hyperlinks.Add Anchor:=Selection, Address:=””, SubAddress:= _
“‘” & sh.Name & “‘” & “!A1”, TextToDisplay:=sh.Name
ActiveCell.Offset(1, 0).Select
End If
Next sh
Step 6:
Close the macro editor and come to the Index Sheet in the Excel workbook. Place the cursor where you would like the Sheet names to start appearing from.
Step 7:
Go to the View tab and click on Macros dropdown. Select View Macros again. The Macro dialog box opens up with “CreateIndex” Macro selected. Click on Run.
Step 8:
Voila. The individual sheet names appear one below the other on the Index Sheet. Notice there is a hyperlink to each sheet names. So you can simply click on any of the sheet names to go to the respective sheet.
Step 9 :
Create a hyperlink on each of the individual sheets from 2009 to 2018 to come back to the Index sheet. This way you can create a back and forth navigation from the index sheets to the individual sheets and back again.
This was neat! Simple yet powerful.
What do you think?


72 thoughts on “Excel Automation: How to Create an Index Sheet in a Workbook”
[…] hope that you have enjoyed our tips and tricks for finding articles on Google and adding data analysis in Excel. If you have any additional tips, […]
… [Trackback]
[…] Find More to that Topic: skillfine.com/excel-automation-creating-index-sheet-in-workbook/ […]
… [Trackback]
[…] Information on that Topic: skillfine.com/excel-automation-creating-index-sheet-in-workbook/ […]
… [Trackback]
[…] Find More Information here on that Topic: skillfine.com/excel-automation-creating-index-sheet-in-workbook/ […]
… [Trackback]
[…] Find More here on that Topic: skillfine.com/excel-automation-creating-index-sheet-in-workbook/ […]
… [Trackback]
[…] Read More Info here to that Topic: skillfine.com/excel-automation-creating-index-sheet-in-workbook/ […]
… [Trackback]
[…] There you will find 75927 additional Info to that Topic: skillfine.com/excel-automation-creating-index-sheet-in-workbook/ […]
… [Trackback]
[…] Find More Information here on that Topic: skillfine.com/excel-automation-creating-index-sheet-in-workbook/ […]
… [Trackback]
[…] Read More on that Topic: skillfine.com/excel-automation-creating-index-sheet-in-workbook/ […]
… [Trackback]
[…] Here you can find 83816 additional Info to that Topic: skillfine.com/excel-automation-creating-index-sheet-in-workbook/ […]
… [Trackback]
[…] Information to that Topic: skillfine.com/excel-automation-creating-index-sheet-in-workbook/ […]
… [Trackback]
[…] Find More Information here to that Topic: skillfine.com/excel-automation-creating-index-sheet-in-workbook/ […]
… [Trackback]
[…] Information on that Topic: skillfine.com/excel-automation-creating-index-sheet-in-workbook/ […]
… [Trackback]
[…] Find More Information here to that Topic: skillfine.com/excel-automation-creating-index-sheet-in-workbook/ […]
… [Trackback]
[…] Read More here on that Topic: skillfine.com/excel-automation-creating-index-sheet-in-workbook/ […]
… [Trackback]
[…] Info on that Topic: skillfine.com/excel-automation-creating-index-sheet-in-workbook/ […]
… [Trackback]
[…] Read More to that Topic: skillfine.com/excel-automation-creating-index-sheet-in-workbook/ […]
… [Trackback]
[…] Find More to that Topic: skillfine.com/excel-automation-creating-index-sheet-in-workbook/ […]
… [Trackback]
[…] Info on that Topic: skillfine.com/excel-automation-creating-index-sheet-in-workbook/ […]
… [Trackback]
[…] There you will find 23658 additional Information to that Topic: skillfine.com/excel-automation-creating-index-sheet-in-workbook/ […]
… [Trackback]
[…] Find More to that Topic: skillfine.com/excel-automation-creating-index-sheet-in-workbook/ […]
… [Trackback]
[…] Read More on that Topic: skillfine.com/excel-automation-creating-index-sheet-in-workbook/ […]
I keep getting senex errors on this – help
Your point of view caught my eye and was very interesting. Thanks. I have a question for you.
Xess Global is a growing digital marketing agency, creatively and technically expertise to translate your brand into its’ best digital character.
Our marketing, designing, and development strategy creates unique, engaging websites, graphics, brands, and other
digital solutions that deliver you a return on creativity.
Hi my friend! I wish to say that this post is amazing,
great written and include approximately all significant
infos. I’d like to peer more posts like this .
What’s up, I would like to subscribe for this webpage to obtain most recent updates, thus where can i do it
please assist.
Avant d’amuser vos enfants, c’est à vous de cacher les bonbons dans
les pièces de la maison que vous avez choisies.
Highly descriptive post, I enjoyed that a lot.
Will there be a part 2?
Hey There. I discovered your weblog the use of msn. This is a very well written article.
I’ll make sure to bookmark it and return to read extra of your useful info.
Thanks for the post. I’ll certainly return.
Hello, everything is going sound here and
ofcourse every one is sharing data, that’s
truly excellent, keep up writing.
Howdy! This post could not be written any
better! Going through this article reminds me of my previous roommate!
He always kept preaching about this. I most certainly will send
this information to him. Pretty sure he’s going to have a great read.
I appreciate you for sharing!
I’m not sure where you’re getting your info, but good topic.
I needs to spend some time learning more or understanding more.
Thanks for excellent info I was looking for this information for
my mission.
Thank you for every other informative blog. The place else could I am getting that type of information written in such a perfect method?
I have a undertaking that I am simply now operating on, and
I’ve been on the look out for such info.
I have beewn explooring for a little forr any high-quality
articles or bllog postts on this kind oof area .
Explorinbg in Yahooo I eventuallly stumbled upon this site.
Readibg this informatio So i’m hhappy to covey thbat I have aan incredibly excellent uncanny feeling I came upon just what I needed.
I suhh a llot unquestionaly will make ssure tto ddo nott oveerlook this site and provides
it a lok regularly.
Spot on with thiks write-up, I honestly feel this sitfe needs much more attention. I’ll
probably bbe returnming tto read trough more, thanks ffor the information!
Hello Dear, are you truly visiting this web site on a regular basis, if so after that you will
absolutely get nice experience.
However, before diving into a vast library of crypto games, it is critical
to examine other important elements.
Great work! This is the kind of info that should be shared across the net.
Disgrace on the seek engines for not positioning this
publish upper! Come on over and visit my site . Thanks =)
My brother recommended I might like this blog.
He was entirely right. This post actually made my day.
You cann’t imagine just how much time I had spent for this info!
Thanks!
Appreciation to my father who shared with me regarding
this web site, this weblog is genuinely awesome.
Unquestionably believe that that you said. Your favorite reason appeared
to be at the net the easiest factor to take note of.
I say to you, I certainly get annoyed even as folks consider issues that they just do not recognise about.
You managed to hit the nail upon the highest as well as outlined
out the entire thing without having side-effects , other people can take a signal.
Will likely be again to get more. Thanks
Simply desire to say your article is as astonishing.
The clarity in your submit is just excellent and i can assume you’re an expert in this subject.
Well with your permission allow me to clutch your feed to keep updated with imminent post.
Thank you one million and please keep up the enjoyable work.
Wow, that’s what I was exploring for, what a stuff!
existing here at this website, thanks admin of this web page.
Excellent post. Keep writing such kind of information on your page.
Im really impressed by your blog.
Hey there, You’ve done an excellent job.
I will certainly digg it and personally recommend to my friends.
I am sure they will be benefited from this site.
Hi there, just became alert to your blog through Google, and
found that it is really informative. I’m gonna
watch out for brussels. I’ll appreciate if you continue this in future.
Many people will be benefited from your writing.
Cheers!
I know this if off topic but I’m looking into starting my own weblog and was wondering what
all is required to get setup? I’m assuming having a blog like yours would cost a
pretty penny? I’m not very web smart so I’m not 100% positive.
Any recommendations or advice would be greatly appreciated.
Thank you
I must thank you for the efforts you have put in writing this blog.
I really hope to view the same high-grade content by you later on as well.
In fact, your creative writing abilities has encouraged me to get my very own blog now 😉
This is the right website for anyone who wishes to understand this topic.
You realize a whole lot its almost tough to argue with you (not that I actually would want to…HaHa).
You definitely put a new spin on a subject that has been discussed for many years.
Excellent stuff, just wonderful!
excellent post, very informative. I’m wondering why the other experts of
this sector do not notice this. You must continue your writing.
I am confident, you have a huge readers’ base already!
It’s hard to find educated people about this subject, but you sound like you
know what you’re talking about! Thanks
I’m not that much of a online reader to be honest but your blogs really nice, keep it
up! I’ll go ahead and bookmark your website to come back
later. Cheers
Whats up this is somewhat of off topic but I was wanting to know
if blogs use WYSIWYG editors or if you have to manually code with HTML.
I’m starting a blog soon but have no coding know-how so I wanted
to get advice from someone with experience. Any help would be greatly appreciated!
Your point of view caught my eye and was very interesting. Thanks. I have a question for you.
MultiChain
Phim Yen Vi is known for her appearances in adult films in Vietnam.
The actress has appeared in multiple films there that have been extremely
popular and also in other countries.
Hi to all, it’s genuinely a good for me to pay a quick visit this web page,
it consists of helpful Information.
If you are going for best contents like myself, simply pay a visit this site daily because it offers quality contents,
thanks
I’ve been surfing online more than 4 hours today, yet I never found any interesting article like yours.
It is pretty worth enough for me. Personally, if all webmasters and bloggers made good content as you did, the net will be a lot more useful than ever before.
Vincenzo de Vit was born in 1810.
id=”7fX3dKwXTZE-PSP4O_cg6A”>Instant Sports Betting Registration with Most Bet
Most Bet has revolutionized the way enthusiasts engage with sports betting by offering an instant registration process.
This feature is designed to cater to both seasoned bettors and newcomers, ensuring that users can dive into the action without
unnecessary delays. With just a few clicks, users can create an account, deposit funds, and place
their bets on a wide array of sports events.
The registration process at Most Bet is remarkably streamlined.
Users simply need to provide basic information such as their email address or phone number.
This minimalist approach ensures that users are not bogged down by lengthy forms or verification processes.
Moreover, Most Bet employs advanced encryption technologies to protect
user data, making it a secure platform for online betting.
Feature Description
Speed Instant account creation
Security Advanced encryption for data safety
Accessibility Mobile-friendly interface
Variety Wide range of sports and events
Once registered, users gain access to a plethora of betting options.
Most Bet covers an extensive range of sports, from popular leagues like the NFL and NBA to niche markets
such as eSports and darts. The platform’s intuitive design allows users
to navigate effortlessly through various betting
markets, making it easy to find the best odds and place bets quickly.
For those who enjoy live betting, Most Bet offers
real-time updates and dynamic odds adjustments.
This feature is particularly appealing for bettors who thrive on the excitement
of in-play wagering. With its commitment to providing a seamless
user experience, Most Bet stands out as a top choice for anyone looking to engage in online sports
betting with minimal hassle.
Quick Steps to Create Your Account on Mostbet in Minutes
Creating an account on Mostbet is a straightforward process that can be completed in just a few minutes.
To get started, navigate to the official Mostbet website.
Once there, locate the registration button prominently displayed on the homepage.
Clicking this button will initiate the registration process, where
you will be prompted to choose from several sign-up options, including email,
phone number, or social media accounts.
For those opting to register via email or phone number,
it is essential to fill in the required fields accurately.
This includes entering your full name, date of birth, and a secure password.
Remember, your password should be a combination of letters,
numbers, and symbols to ensure maximum security.
If you prefer using social media accounts like Facebook or Google,
simply click on the corresponding icon and follow the prompts
to authorize access.
Once you’ve filled in your details, it’s crucial to select your preferred currency
from the available options. Mostbet offers a wide range of currencies to cater to its global
audience. After completing this step, take a moment to review the terms and conditions.
It’s important to understand these as they govern your use of the platform.
Upon agreeing to these terms, click on the “Register” button to finalize
your account creation.
After successful registration, you will receive a confirmation email or SMS
with a verification link or code. This step is vital for activating your account and gaining full access to all features Mostbet has to
offer. Here’s a quick checklist for creating your account:
Visit the Mostbet website.
Click on the registration button.
Choose your sign-up method (email/phone/social media).
Enter required details accurately.
Select preferred currency.
Agree to terms and conditions.
Verify your account via email/SMS.
With these steps completed, users can swiftly dive into the world of online
betting with Mostbet, enjoying its diverse sports markets and
casino games at their fingertips.
Fast Betting Access: Login to Most bet
For those who crave the thrill of betting, Most bet offers
a seamless and fast betting access experience. With
its user-friendly interface, punters can easily log in and start placing bets within minutes.
Most bet is renowned for its swift login process, ensuring that users spend
less time navigating and more time engaging with their favorite
sports events.
To get started with Most bet, follow these simple steps:
Visit the official website: Ensure you are on the authentic Most bet site
to avoid phishing scams.
Locate the login button: Typically found at the top right corner of the homepage.
Enter your credentials: Use your registered email or username and password.
Click ‘Login’: Access your account and start betting immediately.
Once logged in, users are greeted with a plethora of betting options ranging from football, basketball,
to niche sports like darts and eSports. The platform is
designed to cater to both novice bettors and seasoned
punters alike, offering competitive odds and a variety of markets.
Moreover, Most bet stands out with its commitment to
security and privacy. Advanced encryption protocols safeguard user data, providing peace
of mind as they navigate through various betting options.
The bookmaker also supports multiple payment methods, ensuring deposits and withdrawals
are as seamless as possible.
In addition to traditional sports betting, Most bet offers live betting
features that keep adrenaline levels high. Users can place bets in real-time as matches unfold, making every second count.
With constant updates on odds and match statistics, bettors are equipped with all the information they need to make informed decisions.
How Most bet Protects Your Account
In the world of online betting, security is paramount, and Most
bet takes significant measures to protect its users’ accounts.
One of the primary ways it achieves this is through advanced encryption technologies.
By employing SSL (Secure Socket Layer) encryption, Most bet ensures that all data transmitted between the user and the
platform remains confidential and secure from potential
cyber threats. This level of protection is akin to what banks use, providing bettors with peace of mind as they engage in their favorite pastime.
Moreover, Most bet has implemented a robust two-factor authentication (2FA)
system. This extra layer of security requires users to verify their identity through a secondary device or
app, significantly reducing the risk of unauthorized access.
In a landscape where phishing attacks are
prevalent, 2FA acts as a formidable barrier against malicious
actors attempting to compromise user accounts.
By requiring both something the user knows (a password) and something they have (a mobile device), Most bet enhances account security effectively.
Another critical aspect of account protection at Most bet is its proactive monitoring for suspicious activities.
The platform utilizes sophisticated algorithms to detect unusual betting
patterns or login attempts from unfamiliar locations.
If any irregularities are detected, the system can automatically trigger alerts or temporarily lock accounts to prevent potential breaches.
This proactive approach not only safeguards user funds but also helps maintain the integrity of the betting
environment by ensuring fair play.
Finally, customer support plays a vital role in account protection at Most bet.
The support team is trained to assist users in safeguarding their accounts and can provide guidance on best practices for maintaining security.
Whether it’s advice on creating strong passwords or assistance
with enabling 2FA, Most bet’s support staff are equipped to help users navigate any
concerns they may have regarding account safety.
With these comprehensive measures in place, Most bet demonstrates its commitment to providing a
secure and trustworthy betting experience for all its users.
Convenient Betting: Download the App from Most bet
Most bet has revolutionized the way enthusiasts engage with sports betting by offering a seamless, user-friendly app.
With just a few taps, users can access a wide array of betting options, ensuring that they never miss
out on the action. The Most bet app is designed to cater to
both seasoned bettors and newcomers, providing an intuitive interface that simplifies the
betting process. Whether it’s live betting or pre-match odds,
this app ensures that users have all the tools they need at their fingertips.
Downloading the app is straightforward and hassle-free. Users can visit the official
Most bet website to find links for both Android and iOS
platforms. The installation process is quick, allowing bettors to dive into the action almost immediately.
Once installed, users are greeted with a
sleek design that prioritizes functionality and ease of use.
The app’s performance is optimized for speed, ensuring that
even during peak times, users experience minimal lag or downtime.
Security is paramount for any online transaction, and Most bet takes this seriously.
The app employs advanced encryption technologies
to safeguard user data and financial transactions.
This commitment to security ensures that users can place bets with confidence, knowing their information is protected.
Moreover, the app supports multiple payment methods, making it convenient for users worldwide to deposit and withdraw funds seamlessly.
The Most bet app also offers personalized features such
as notifications for upcoming matches and special promotions tailored to individual preferences.
This personalization enhances user engagement by keeping them informed about opportunities they
might be interested in. Furthermore, customer support is readily available through the app,
providing assistance whenever needed. With its combination of convenience, security,
and personalization, Most bet has set a new
standard in the world of online sports betting apps.
Key Features of the Mobile App by Most bet
The Most bet mobile app is a game-changer for betting enthusiasts, offering a seamless experience with its user-friendly interface and advanced features.
Available on both Android and iOS platforms,
the app ensures that users can place bets anytime, anywhere.
One of the standout features is its live betting capability, allowing punters to place bets in real-time as events unfold.
This feature is enhanced by live streaming options, providing users
with the ability to watch games directly through the app, ensuring
they never miss a moment of the mostbetbd action.
Another key feature of the Most bet app is its comprehensive sportsbook, which covers
a wide range of sports from football and basketball to
more niche markets like eSports and darts. The app also boasts
an extensive selection of betting markets, including traditional options like
moneyline and over/under, as well as more exotic bets such as Asian handicaps and prop bets.
The variety ensures that every bettor finds something to suit their
preferences.
Security is paramount for any online transaction, and the Most bet app excels in this
area with robust encryption protocols that protect user data.
Additionally, it supports multiple payment methods including credit
cards, e-wallets, and cryptocurrencies, providing flexibility and convenience
for deposits and withdrawals. The quick payout system further enhances user satisfaction by ensuring that winnings are processed efficiently.
The app’s intuitive design ensures smooth navigation across different sections, from placing bets to managing account settings.
Users can easily access detailed statistics and analytics to make informed betting decisions.
Moreover, customer support is readily available through live chat or email within the app, offering prompt assistance whenever needed.
With its rich feature set and commitment to user experience, the Most bet mobile app stands out as a top choice for bettors worldwide.
Instant Wins with Live Betting on Most Bet
When it comes to live betting, Most Bet has emerged as a frontrunner, offering an exhilarating platform for
punters looking for instant wins. The thrill of live
betting lies in its dynamic nature, allowing bettors to place wagers as
the action unfolds. This real-time engagement enhances the excitement and
provides an opportunity for strategic decisions based on the evolving dynamics of the game.
Most Bet capitalizes on this by offering competitive odds and a user-friendly interface
that caters to both novice and seasoned bettors.
The key to success with live betting on Most Bet
is understanding the markets and timing your bets effectively.
The platform offers a plethora of options, from traditional sports like football and basketball
to niche markets such as eSports and virtual sports.
Bettors can take advantage of fluctuating odds during a
match, allowing them to place bets at optimal moments.
For instance, if a football team is trailing but showing signs of
resurgence, placing a bet on their comeback can yield substantial returns.
Event Type Average Odds Change Potential Instant Win
Football 1.5x – 2x High
Basketball 1.3x – 1.8x Medium
eSports 1.4x – 2.5x High
Live betting also demands quick decision-making skills and a
keen eye for detail. Most Bet provides real-time statistics
and updates that help bettors make informed choices.
The ability to cash out early is another feature that enhances the appeal of live betting on this platform.
By cashing out at the right moment, punters can secure profits or minimize losses, adding another layer of strategy to their
betting experience.
In addition to its robust live betting offerings, Most Bet entices users with promotions and
bonuses tailored for live events. These incentives not
only enhance the overall value proposition but also provide bettors with additional opportunities to
maximize their winnings. Whether it’s through enhanced odds or cashback
offers, Most Bet ensures that its users are always engaged
and rewarded for their participation in live betting events.
Successful Betting Strategies with Mostbet
Mostbet has emerged as a prominent player in the online
betting industry, offering a wide array of sports and casino games to its users.
To maximize success with Mostbet, bettors need to employ strategic approaches that leverage the platform’s features.
One effective strategy is to focus on value betting.
This involves identifying odds that are higher than they should be,
allowing bettors to capitalize on potential discrepancies in the bookmaker’s calculations.
By consistently finding value bets, players can increase
their chances of long-term profitability.
Another strategy involves utilizing the live
betting feature offered by Mostbet. Live betting allows users to place bets on events
as they unfold, providing an opportunity to react
to real-time developments. This dynamic approach can be particularly advantageous when combined
with thorough research and understanding of the sport
in question. Bettors who excel at live betting often possess a keen sense for game dynamics and can make informed decisions quickly,
potentially turning unexpected outcomes into profitable ventures.
Bankroll management is a crucial aspect of any successful betting strategy on Mostbet.
Bettors should establish a budget and stick to it, ensuring that they do not wager more than they
can afford to lose. A common recommendation is the Kelly Criterion, which helps determine the optimal size of a series of bets based on perceived edge and bankroll size.
By managing their funds wisely, bettors can mitigate risks and enhance their overall
experience on the platform.
Moreover, staying informed about sports news and trends is vital for making educated bets on Mostbet.
Following expert analysis, monitoring player
injuries, and understanding team dynamics can provide valuable insights that
influence betting decisions. Engaging with online communities and forums dedicated
to sports betting can also offer additional perspectives and tips from seasoned bettors.
By combining these strategies with Mostbet’s user-friendly interface and diverse
offerings, bettors can significantly enhance their chances of
achieving consistent success.
Author mvorganizing.orgPosted on 13 June 2025Categories Blog
I don’t think the title of your article matches the content lol. Just kidding, mainly because I had some doubts after reading the article.
91249 453664Some genuinely nice stuff on this internet internet site , I it. 668517
299690 908783What a lovely blog page. I will undoubtedly be back again. Please maintain writing! 639021
23289 963342I think other site proprietors need to take this web site as an model, quite clean and fantastic user friendly style and design, as effectively as the content material. You are an expert in this topic! 323836
353453 818320Watch the strategies presented continue reading to discover and just listen how to carry out this wonderful like you organize your company at the moment. educational 395174
Thank you a lot for sharing this with all folks
you actually realize what you’re speaking about! Bookmarked.
Kindly additionally seek advice from my site =).
We could have a link trade contract between us
fantastic issues altogether, you simply won a
new reader. What may you recommend about your submit that you simply
made some days ago? Any sure?
990426 217396Good day. Extremely cool weblog!! Man .. Excellent .. Remarkable .. Ill bookmark your internet site and take the feeds additionallyI am glad to locate numerous beneficial information appropriate here within the post. Thank you for sharing.. 287564
Your point of view caught my eye and was very interesting. Thanks. I have a question for you.
Hmm is anyone else experiencing problems with the images on this blog loading?
I’m trying to figure out if its a problem on my end or if it’s
the blog. Any responses would be greatly appreciated.
355488 575343Youve actually written a really good quality post here. Thank you really significantly 596634