
In the world of data management, Excel reigns supreme. Whether you are a seasoned analyst or a casual spreadsheet enthusiast, you know Excel’s functions are crucial for transforming raw data into meaningful insights. One of the newest and most exciting additions to Excel’s powerful toolkit is the TEXTSPLIT function. Please note that this function is available on Microsoft Office Excel 365 only. As its name suggests, TEXTSPLIT is a function designed to split text strings into separate columns or rows, making it indispensable for handling messy or complex data. Using this functionis like ordering a pizza that arrives already sliced, as opposed to getting a whole pizza and having to cut it yourself with a blunt knife. It makes what used to be a tedious process much faster and more efficient!
In this article, we’ll dive deep into the mechanics of the TEXTSPLIT function, walk through practical examples, and explore its advantages over traditional alternatives. So, whether you’re splitting names, parsing addresses, or extracting key information from lengthy strings, TEXTSPLIT is here to save you time and effort.
What Is The TEXTSPLIT Function In Excel?
The TextSplit function in excel is a versatile tool that allows users to split a text string based on a specified delimiter or multiple delimiters. In plain terms, if you’ve ever had a long string of text in a cell that you wanted to break up (like separating first and last names), this function does the heavy lifting for you.
Syntax:
TEXTSPLIT(text, column_delimiter, [row_delimiter], [ignore_empty], [match_mode], [pad_width])
- text: The text string you want to split.
- column_delimiter: The character(s) that indicate where to split the text into columns.
- row_delimiter: (Optional) The characters that indicate where to split the text into rows.
- ignore_empty: (Optional) A boolean (TRUE or FALSE) value that controls whether empty cells resulting from the split should be ignored.
- match_mode: In case of a case-insensitive match, you must set this to 1. Defaults to 0, which does a case-sensitive match.
- pad_with: The value to use for padding when the output array has uneven row lengths. If specified, it fills in the gaps in rows that don’t have as many columns as the longest row.
Why Should You Use TEXTSPLIT?
Traditionally, Excel users relied on text functions like LEFT(), RIGHT(), MID(), or even Text to Columns to split data, but those approaches were cumbersome for complex text manipulation. TEXTSPLIT function in Excel simplifies this process by:
- Handling multiple delimiters.
- Automatically distributing the text into rows or columns.
- Providing greater flexibility and control.
Follow along to see some real-world scenarios where this function is used.
Simple & Practical Examples of TEXTSPLIT Function in Excel in Action
Here’s a link to all the practical examples of TextSplit Function in Excel that we’ll discuss thoroughly in this article! Please note that this is a view only document which would require you to create a copy in your own storage space to get any edit access. Let’s get started!
Example 1. Splitting Full Names with Middle Names, Titles, and Suffixes
Imagine you’re working with a customer relations database. In some datasets, full names are more than just first and last names. You may encounter titles (like “Dr.” or “Ms.”), middle names, or suffixes (like “Jr.” or “III”), making the task of separating name components more complex. This scenario is common in HR systems, customer databases, or when working with formal documents.

Customer Info Data
In this case, you want to split the name into Title, First Name, Middle Name, Last Name, and Suffix. To handle the complexity, you’ll need a combination of delimiters and logic to account for the various components.
Example:
You can use the TextSplit function with a space as the delimiter, but this will require handling varying lengths of names and optional components (like titles and suffixes).
Here’s the formula to use textsplit with spaces:
=TEXTSPLIT(A7, ” “)
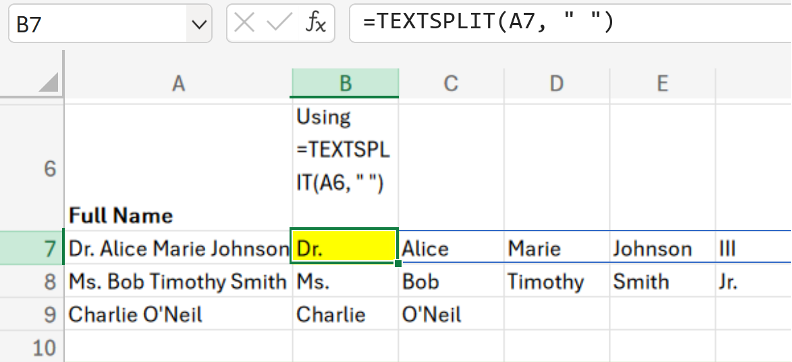
Splitting a complex name into its components (Title, First Name, Middle Name, Last Name, Suffix) using the TEXTSPLIT function
However, handling cases without a title or suffix (like “Charlie O’Neil”) may require additional checks to avoid leaving empty cells. You could use IF() or LEN() combined with TEXTSPLIT to fine-tune the extraction process.
**
Example 2. Parsing Email Addresses
Let’s say you’ve got a column full of email addresses, and you want to extract the usernames (everything before the “@”) and the domains (everything after “@”). This can be useful for understanding which domains your customers use or for sending personalized email campaigns.
Example:
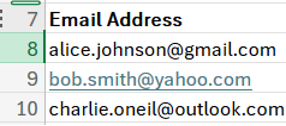
Email Addresses
To split the username from the domain, use the below formula. Here, the “@” symbol is the delimiter.
=TEXTSPLIT(A14, “@”)
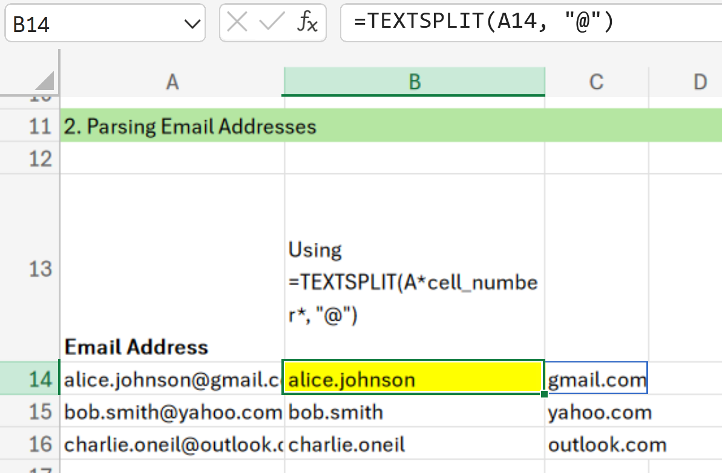
Splitting an email address into an ID name and domain name using the TEXTSPLIT function
**
Example 3. Splitting Data into Rows Using Column & Row Delimiters
TEXTSPLIT can handle multiple delimiters and split data across rows or columns. Let’s take a more complex example: you have a list of items purchased, their quantity, and their price, all in a single cell, separated by commas and semicolons.
Example:

Dynamic ArrayList
If you want to split this information into rows (each purchase on a separate row) and columns (item, quantity, and price), you can use both a column and a row delimiter.
=TEXTSPLIT(A20, “,”, “;”)
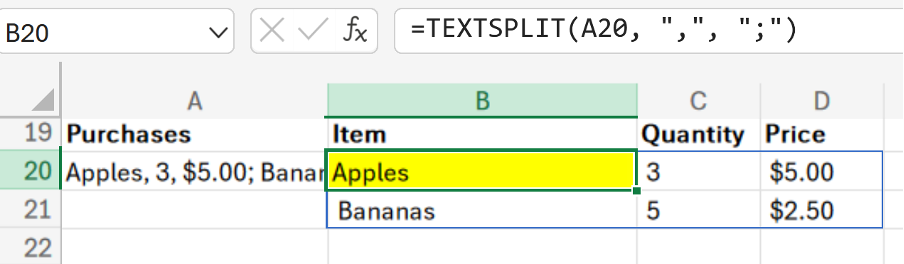
Using TEXTSPLIT with both column and row delimiters (a hyphen and semi-colon) to separate item, quantity and price into distinct columns
Here, we used a comma (“,”) to separate the item, quantity, and price into columns, and a semicolon (“;”) to separate each purchase into a new row. What you see here is a dynamic array. Dynamic arrays make it easier to work with long lists, especially when you’re dealing with structured data like CSV files or text that includes multiple entries in a single cell.
**
Example 4. Extracting Data from Addresses
Another powerful use case is cleaning up and extracting data from addresses, which often come in messy formats.
Example:
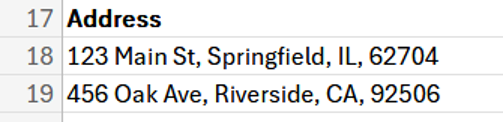
List of Addresses
You can easily extract the street, city, state, and ZIP code into separate columns using this formula:
=TEXTSPLIT(A26, “, “)
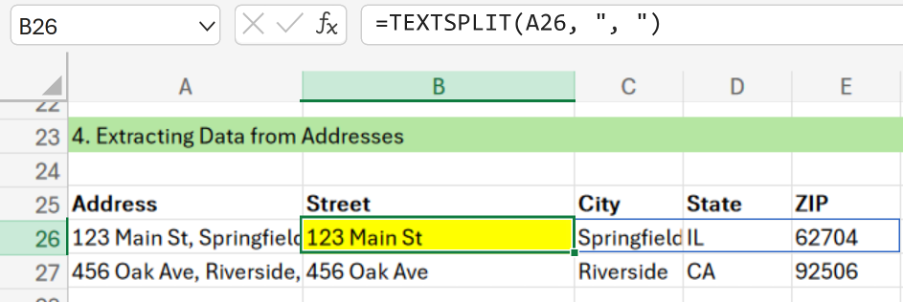
Splitting an address into multiple distinct constituents
**
Example 5. TextSplit with Linefeed, missing, and undefined values
Imagine you’re working with a dataset that contains monthly sales information in cell A14. Each month’s data includes the month name, product name, sales representative name, the number of units sold, and the total revenue, separated by colons (:). Each new line represents a new month, and a linefeed (CHAR(10)) separates these rows. When data has been entered with Alt + Enter (which inserts a line break within a cell), Excel stores that line break as a CHAR(10) character. Knowing that, now you want to split this data into multiple columns and multiple rows, ignoring empty values and handling missing data intelligently.
Note: You can easily find information on ASCII character codes, such as CHAR(10) for line feeds, through a quick Google search. Simply searching for something like “Excel CHAR codes” or “ASCII table” will provide comprehensive lists of ASCII characters and their corresponding codes.
Additionally, resources such as Microsoft’s official Excel documentation often include detailed explanations of how to handle special characters, including line breaks, tabs, and more.
Common ASCII Characters:
- CHAR(10): Line feed (used for line breaks within cells)
- CHAR(13): Carriage return (sometimes used for new lines, often combined with CHAR(10))
- CHAR(9): Tab (used in cases where tab-separated values exist)
Example:
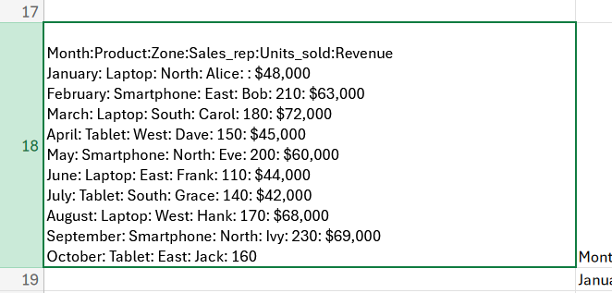
Sales information in single cell
As you see here, the units_sold is empty for January and the revenue for October is not defined. These situations may cause a mess later and therefore, we must TEXTSPLIT to manage missing values, ignore empty values, and pad undefined column values with placeholder values.
=TEXTSPLIT(A31, “:”, CHAR(10), TRUE, 0, “UNDEFINED”)
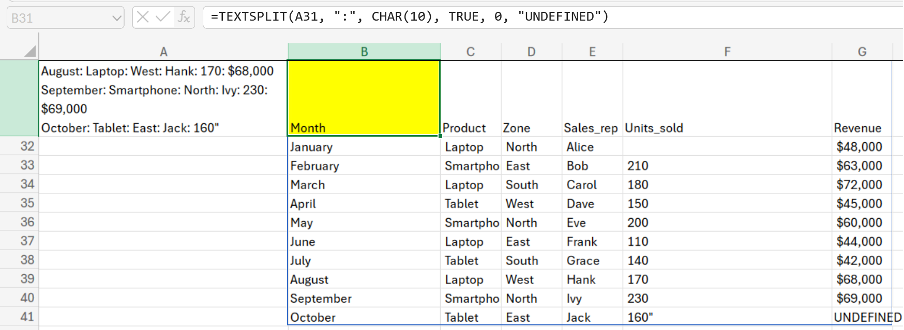
Splitting data from single cell into multiple rows and column using textsplit function
**
Combining TEXTSPLIT for Advanced Data Manipulation (along with Other Excel Functions)
While TEXTSPLIT on its own is a powerful tool, its true potential shines when used in combination with other Excel functions. Whether you’re working with dynamic datasets, extracting specific pieces of information, or automating processes that involve cleaning and structuring data, pairing TEXTSPLIT with other functions can save you a lot of time and effort.
Example 1. TextSplit with Multiple Delimiters
In real-world data, text strings often contain multiple delimiters—like spaces, commas, or even a combination of symbols in the same text string. In such cases, TEXTSPLIT can handle more than one delimiter at a time, simplifying what would otherwise require complex nested formulas.
Example:
Imagine you have a list of product codes with both a hyphen and a comma acting as delimiters, like this:
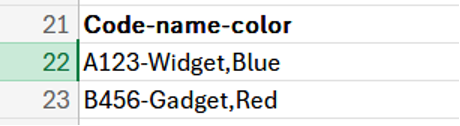
Product Details Column
If you wanted to extract the product code, name, and color into separate columns, TextSplit can do this easily. Here’s how you would set it up:
=TEXTSPLIT(A22, {“-“, “,”})
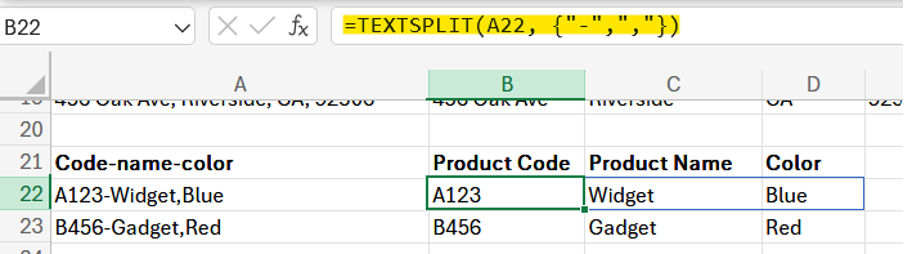
Using TEXTSPLIT with multiple delimiters (hyphen and comma) to separate product codes, names, and colors into different columns.
Let’s look at another example along the same lines. You have a dataset with inconsistent delimiters and spacing issues, and you need to clean it up. Here’s the data:
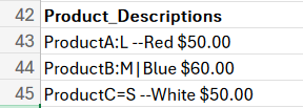
Product Information
The problem here is inconsistent formatting with spaces, double hyphens, colons, and other characters. We can use TEXTSPLIT to manage this, but we need to handle both delimiters and spacing.
To cleanly split this dataset, we can use TEXTSPLIT with multiple delimiters (–, |, =, ,, and spaces):
=TEXTSPLIT(A2, {” –“, “|”, “:”, “=”, “,”, ” “})
This splits the text into:
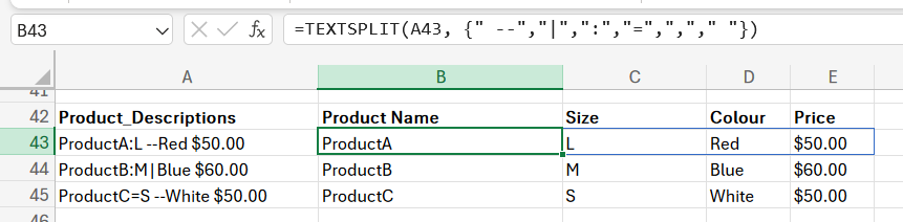
Product Information split into name, size, colour, and price info
Without TEXTSPLIT, achieving this would require multiple steps using FIND(), MID(), or LEFT() to handle each delimiter separately. With TEXTSPLIT, you can handle it all at once.
**
Example 2. Filtering and Extracting Data Using TEXTSPLIT with TEXTJOIN
Sometimes, you may need to extract specific parts of a text string and reassemble them into a different format. This is common when dealing with long addresses or complex data strings. By combining TEXTSPLIT with TEXTJOIN, you can selectively split, filter, and recombine text in just a few steps.
Example:
Let’s say you have an address like:

Address Column
You want to extract only the city and state (New York and NY in this case). Using TEXTSPLIT in Excel, you can split the address by commas, and then use TEXTJOIN to recombine the city and state into one cell:
=TEXTJOIN(“, “, TRUE, INDEX(TEXTSPLIT(A27, “, “), {3,4}))
This formula takes the third and fourth elements (city and state) from the TEXTSPLIT function and joins them with a comma in between. The result will be:

Result of combining TEXTSPLIT and TEXTJOIN to extract and join specific elements (City and State) from a full address.
This combination allows for more dynamic data manipulation where you can pull out and reformat only the pieces you need without cluttering your worksheet with multiple intermediary columns.
**
Example 3. Cleaning Up Inconsistent Data with TRIM and TEXTSPLIT
Real-world data is often messy, with extra spaces or inconsistent formatting making it difficult to extract valuable information. TEXTSPLIT can be paired with the TRIM function to clean up such inconsistencies before splitting text strings.
Example:
Consider a dataset where names are inconsistently spaced:
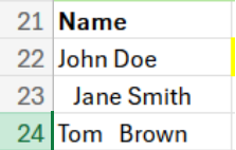
Data with inconsistent tabs and spaces
If you try to split these names using TEXTSPLIT(A2, ” “), you might end up with extra empty cells or missing data due to the irregular spacing. You can see an extra space in front of “Jane Smith” in cell A23 and two spaces between “Tom” and “Brown” in cell A24. To solve this, you can use TRIM to clean up the spaces before applying TEXTSPLIT:
=TEXTSPLIT(TRIM(A22), ” “)
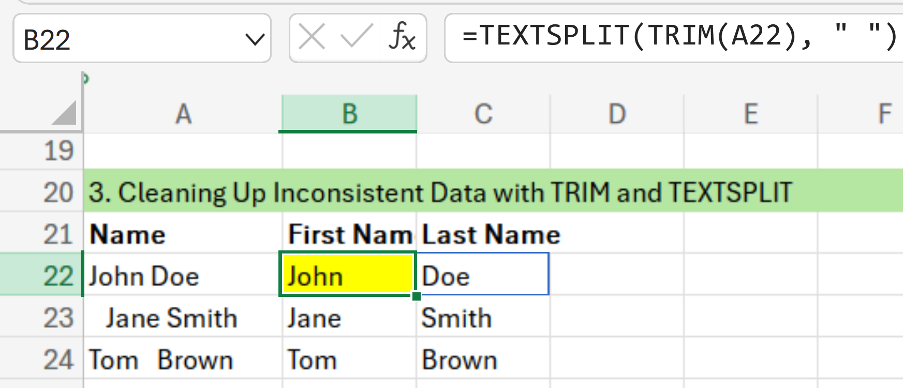
Result of using TEXTSPLIT in Excel and TRIM function to remove unnecessary spaces and split text
This will ensure that only one space is recognized as a delimiter, and you get clean first and last name splits.
**
Example 4. TEXTSPLIT and VLOOKUP
Combining TEXTSPLIT and VLOOKUP can be very powerful for searching and extracting data within structured datasets. In real-world scenarios, you might have strings of text that you need to break down into individual components (using TEXTSPLIT) and then look up specific information from a corresponding dataset (using VLOOKUP).
Example:
Imagine you are working with a dataset that contains flight codes, which encode information about the flight such as the airline code, flight number, departure airport code, and arrival airport code in a single cell. Here’s what the dataset looks like:
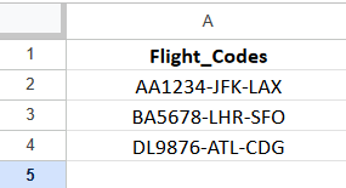
Flight code information (seperated by hyphen)
You want to:
- Split the flight code into individual components (airline, flight number, departure, and arrival airport).
- Use VLOOKUP to fetch details about the airports based on their IATA codes from another table.
Step 1: Splitting Flight Information Using TEXTSPLIT
You can use TEXTSPLIT to break the flight code string into its separate parts. The delimiter here is the dash -.
=TEXTSPLIT(A2, “-“)
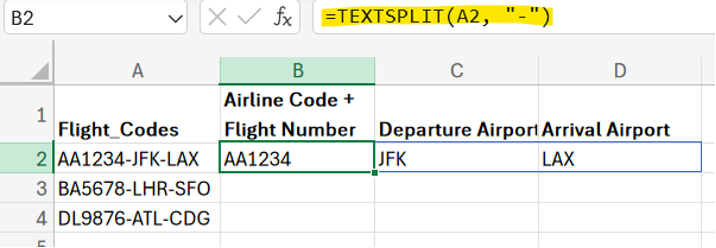
Splitting flight info column data into multiple columns
Step 2: Using VLOOKUP to Retrieve Airport Names
Now, you have the departure and arrival airport codes (JFK and LAX in this case). You also have a lookup table with airport names based on IATA codes:
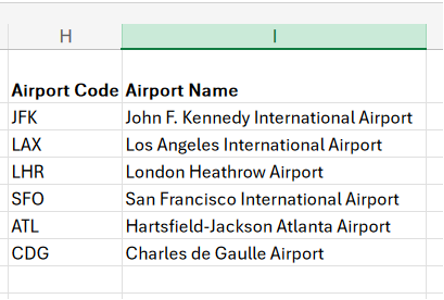
International Air Transport Association codes
To fetch the full name of each airport, use VLOOKUP. Here’s how you can combine it with TEXTSPLIT:
=VLOOKUP(INDEX(TEXTSPLIT(A2, “-“), 2), $H$2:$I$7, 2, FALSE)
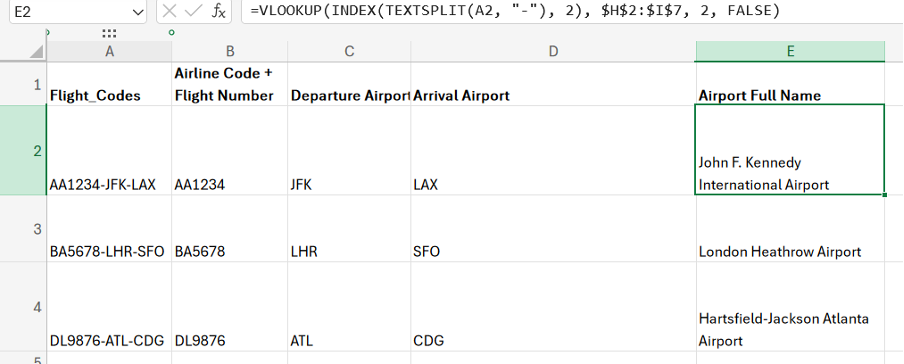
Combined result of textsplit and vlookup functions
Here, the INDEX function selects a specific part of the array that was generated by TEXTSPLIT in Excel. The number 2 in the INDEX function parameters refers to the position of the item to be extracted. For AA1234-JFK-LAX, that would be JFK, which is the departure airport code.
$H$2:$I$7 is the range of cells where the lookup table is located (Column H – airport codes and Column I – Airport Name). The dollar signs ($) before the cell references H2 and I7 make the range absolute. This means the range won’t change if you drag the formula down to other rows. You want to keep the reference fixed to this specific lookup table.
The parameter ‘2’ tells VLOOKUP to return the value from the second column in the lookup range (i.e., Column I, which contains the Airport Names).
‘FALSE’ tells VLOOKUP to perform an exact match search. It ensures that the function will only return a value if it finds an exact match for the airport code (e.g., JFK).
**
Example 5. TEXTSPLIT and TRANSPOSE
Using TEXTSPLIT in combination with TRANSPOSE allows you to split text strings and convert them from horizontal arrays (columns) to vertical arrays (rows), or vice versa. This can be useful when you need to rearrange data for further processing or presentation.
Example:
Let’s say you have a list of items stored in a single cell, separated by commas, like this:
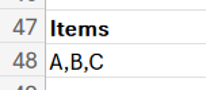
Comma-seperated list of items
You want to:
- Split the items into individual values.
- Transpose the values so that they appear vertically rather than horizontally.
You can use TEXTSPLIT to break the string of items into individual values. By default, this will spill horizontally (across columns). To change the horizontal array into a vertical array (across rows), use the TRANSPOSE function in combination with TEXTSPLIT.
=TRANSPOSE(TEXTSPLIT(A48, “,”))
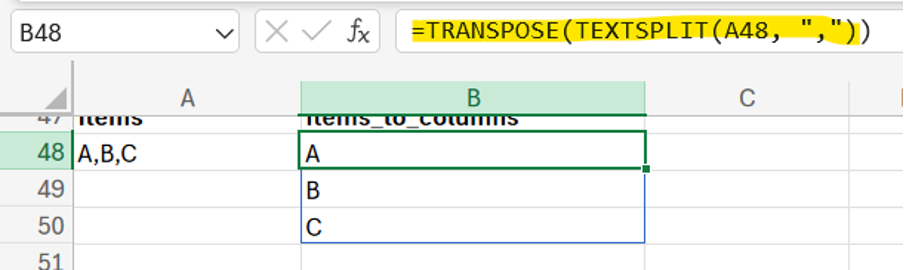
Result of string split by comma and items transposed from row to column
**
Comparing TEXTSPLIT Function in Excel to Traditional Methods
1. Left() and Find()
Before TEXTSPLIT, splitting text required multiple steps or complex formulas, including functions like FIND(), LEN(), LEFT(), RIGHT(), and MID(). For example, to extract a first name from a full name using LEFT() and FIND() would look like this:
=LEFT(A2, FIND(” “, A2)-1)
While effective, these older methods can quickly become unwieldy, especially for more complex text splitting tasks. Functions like FIND() would have to be nested multiple times in case of multiple delimiters. This makes the code unmanageable, complex, difficult to read and debug. TEXTSPLIT, on the other hand, is clean, straightforward and easily handles multiple delimiters, allowing for faster and more efficient data processing.
2. TEXTSPLIT VS TEXT TO COLUMNS
TEXTSPLIT function and Text to Columns wizard are both powerful tools in Excel for breaking down text data, but they serve different purposes and offer varying levels of flexibility.
TEXTSPLIT is a formula-based function that allows users to split text using multiple delimiters (e.g., commas, spaces, or custom characters) within a single formula. It dynamically updates as the source data changes, making it ideal for datasets that require ongoing adjustments. Furthermore, it can split text into both rows and columns, providing enhanced control over data organization. Options like ignore_empty and pad_with help manage missing data effectively. Additionally, it integrates seamlessly with other functions like VLOOKUP and INDEX, enabling complex data manipulations.
On the other hand, Text to Columns is a manual feature suited for one-time operations. It allows users to split text based on a single delimiter and produces outputs only in columns. This tool is simple and straightforward, but it does not automatically update when the source data changes, making it less suitable for dynamic datasets. Moreover, it also replaces the original data with the transformed data, thereby compromising on important data retention.
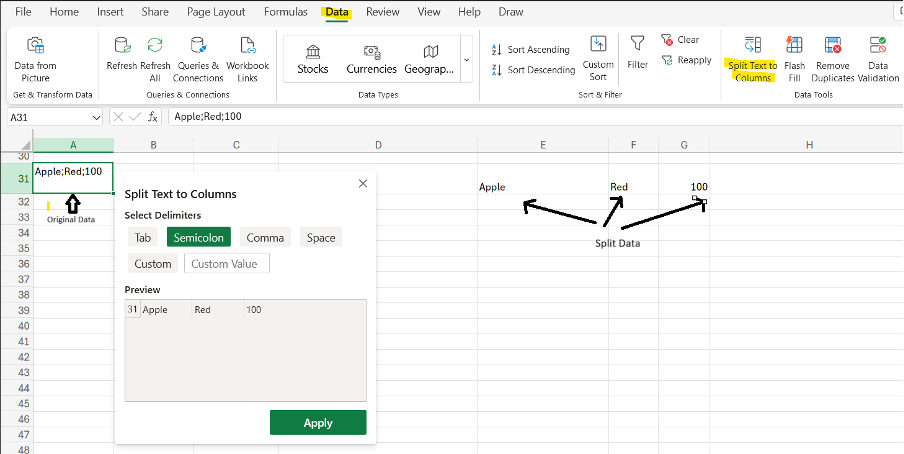
Text To Column Widget Example
**
Limitations of TEXTSPLIT Function in Excel
While TEXTSPLIT function in Excel is extremely versatile, it has a few limitations to be aware of:
- Case Sensitivity: TEXTSPLIT is case-sensitive when specifying delimiters.
- Delimiters Must Be Consistent: The function works best when delimiters are used consistently throughout the data.
- Dynamic Array Support: As a dynamic array function, it requires Excel versions that support dynamic arrays (Excel 365 or Excel 2021).
**
How To Resolve Errors While Using Textsplit?
When using the TEXTSPLIT function in Excel, users may encounter several common errors or issues. Here are some of them along with potential causes and solutions:
#VALUE! Error
● Cause: This error often occurs if the input cell (e.g., A3) is empty or if the delimiters are incorrectly specified.
● Solution: Ensure the input cell contains data and that the delimiters are defined correctly. Verify that you’re using the correct syntax for delimiters, especially if using multiple ones.
#NAME? Error
● Cause: This error indicates that Excel does not recognize the function, which may happen if you’re using an older version of Excel that doesn’t support TEXTSPLIT.
● Solution: Ensure you are using Excel for Microsoft 365 or Excel 2021, as these versions support TEXTSPLIT. If you are using an older version, consider upgrading or using alternatives like Text to Columns.
#SPILL! Error
● Cause: The #SPILL! error occurs when the result of a formula that is supposed to return an array cannot be displayed because there are already values in the cells where the array output would “spill” into. This is common with functions that return multiple results, such as TEXTSPLIT.
- Check Surrounding Cells: Ensure that the cells immediately below and to the right of the cell where you entered the formula are empty. If not, clear any values in these cells to allow the output to spill properly.
- Move the Formula: If you cannot clear the cells, consider moving the formula to a different location where there is ample space for the output.
Example: If you enter the formula in cell B3 and it needs to spill over into B4 but those cells are occupied, you’ll get a #SPILL! Error. Now you know how to work with TextSplit without spill!
**
Conclusion: TEXTSPLIT Function in Excel is a Game-Changer
The TEXTSPLIT function is a revolutionary addition to Excel, making text manipulation faster, easier, and more intuitive. Its ability to handle multiple delimiters and split text into both rows and columns means it’s perfect for a wide range of real-world scenarios. From splitting names and parsing email addresses to handling complex strings like purchases or addresses, TEXTSPLIT offers a flexible and efficient solution.
As data continues to grow in volume and complexity, functions like TEXTSPLIT empower users to manage and analyze information with ease. If you’re still using older methods to split text, it’s time to upgrade your approach and embrace the simplicity and power of TEXTSPLIT!

