
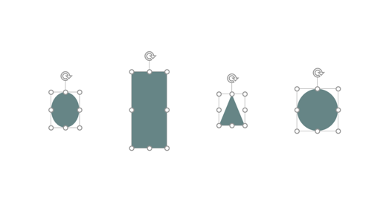
Introduction:
In the realm of presentations, every detail matters. From the choice of colours to the arrangement of elements, each component contributes to the overall impact of your message. One often overlooked yet critical aspect of presentation design is alignment. Alignment in PowerPoint refers to the positioning or arrangement of elements in a specific order or configuration. In technology, computing, programming, and communications, alignment often refers to the arrangement of text, images, or other objects on a digital platform. From the outset, it’s evident that proper alignment is vital for visual appeal. Good alignment organizes elements, making them easy to read and aesthetically pleasing. The alignment tools in Microsoft PowerPoint are indispensable for crafting professional and attractive presentations. These tools ensure that objects like text boxes, images, shapes, and charts are consistently and neatly positioned. Proper alignment leads to a cohesive and polished appearance for your powerpoint slide elements.
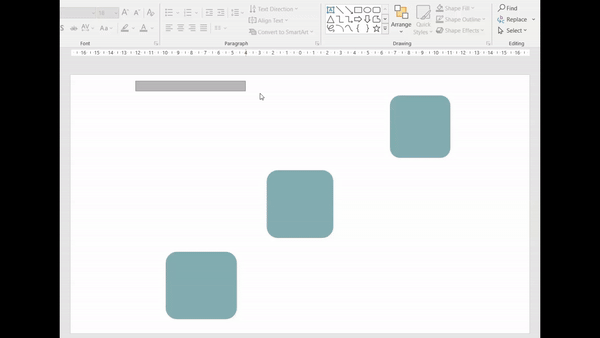
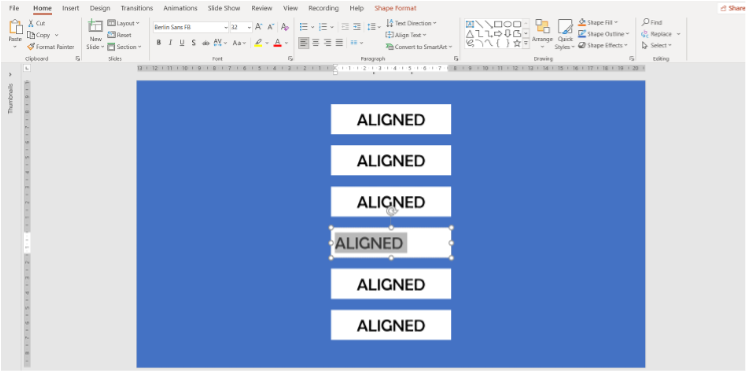
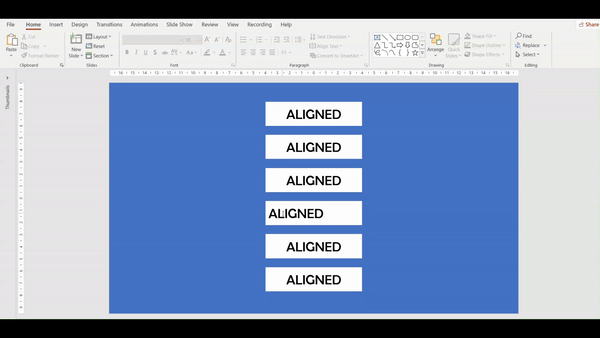
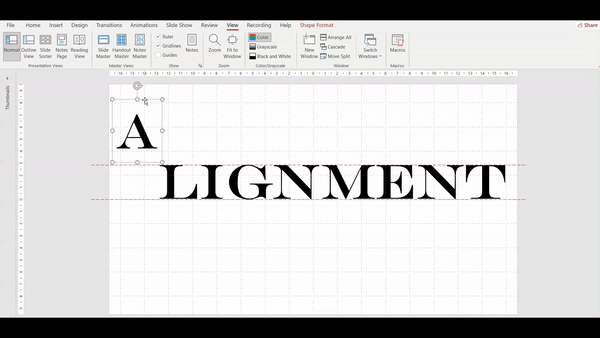
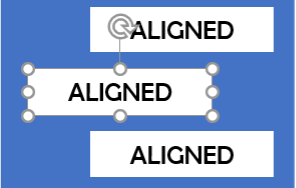
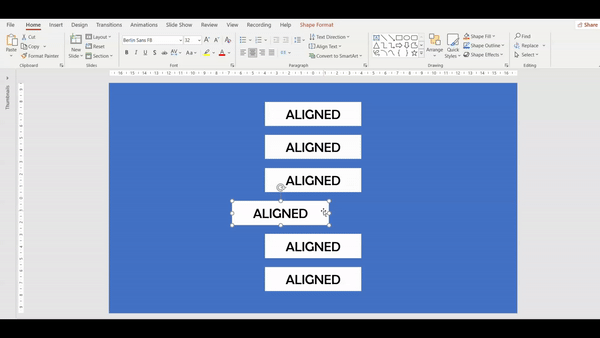
Let’s look at this example.
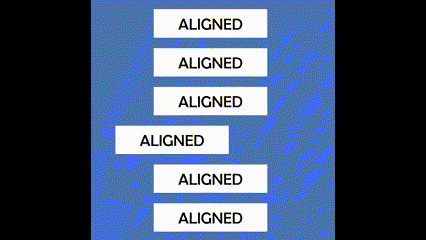
Notice the difference immediately? The data in the first example appears random and overall unsavoury for the eyes. Such a presentation not only looks unprofessional but also confuses the audience, detracting from the message you’re trying to convey Now imagine an entire presentation like that. In comparison, the data in the second image looks clean and professional.
Alignment plays a pivotal role in organizing content and creating visual harmony. By aligning elements precisely, you guide the viewer’s eyes smoothly across the slide, making information easier to digest and understand.
How does Alignment in PowerPoint help?
Enhances Readability: Well-aligned text and objects make your slides easier to read and understand.
Improves Aesthetics: A clean and organized layout is visually appealing and professional.
Maintains Consistency: Consistent alignment across slides helps maintain a uniform look, which is crucial for branding and aesthetics
Focuses Attention: Properly aligned elements can guide the viewer’s eye to key points, making your message more effective.
Types Of Alignment in PowerPoint
- Horizontal Alignment
- Left Alignment: Aligns objects or text to the left edge of the slide or the selected area.
Shortcut (only for text): Ctrl+L (Windows) | Cmd+L (Mac)
- Center Alignment: Centers objects or text horizontally on the slide or within the selected area.
Shortcut (only for text): Ctrl+E (Windows) | Cmd+E (Mac)
- Right Alignment: Aligns objects or text to the right edge of the slide or the selected area.
Shortcut (only for text): Ctrl+R (Windows) | Cmd+R (Mac)
- Justified Alignment: Justified alignment, or justification, is a text alignment technique that adds space between words to make each line of text the same length and have straight edges on both sides. Justified text can make a document, presentation, or web page look clean and professional. However, it can also create gaps and rivers in the text
Shortcut (only for text): Ctrl+J (Windows) | Cmd+J (Mac)
2. Vertical Alignment
- Top Alignment: Aligns objects or text to the top edge of the slide or the selected area.
- Middle Alignment: Aligns objects or text to the top edge of the slide or the selected area.
- Bottom Alignment: Aligns objects or text to the bottom edge of the slide or the selected area.
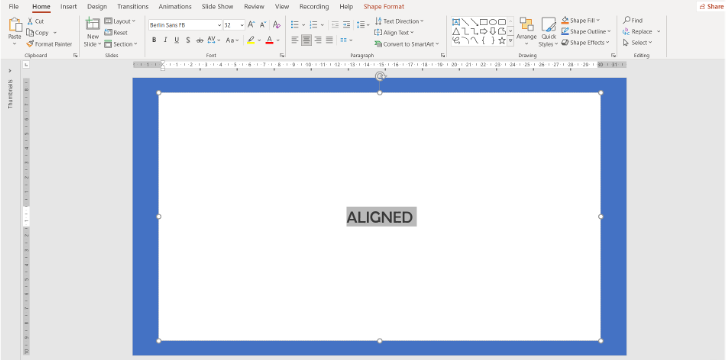
Using the Alignment in PowerPoint tool
ALIGNMENT OF OBJECTS IN POWERPOINT
To begin, open your presentation and navigate to the slide containing the objects you want to align:
- Select the objects you want to align on the PowerPoint slide
2. Go to the Home tab
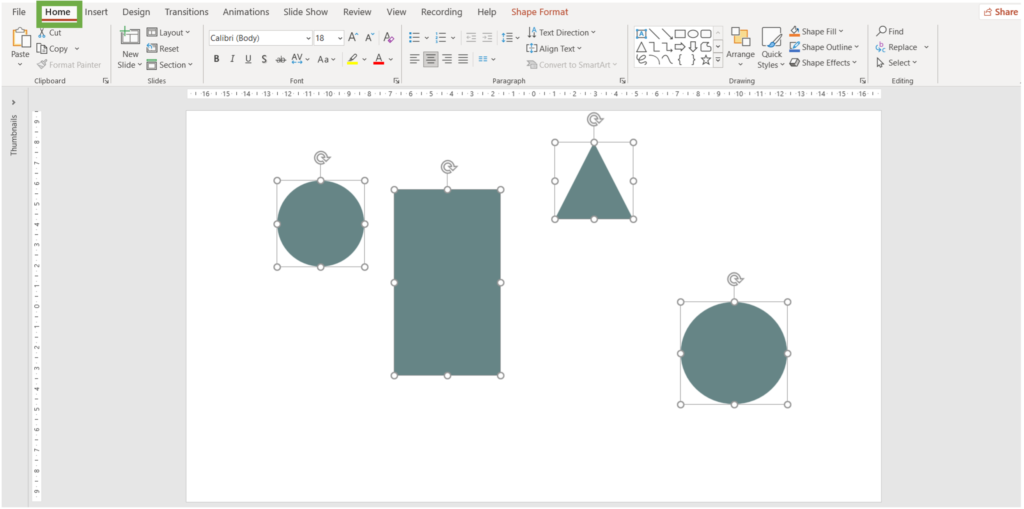
3. Go to the Drawing group, and click on Arrange
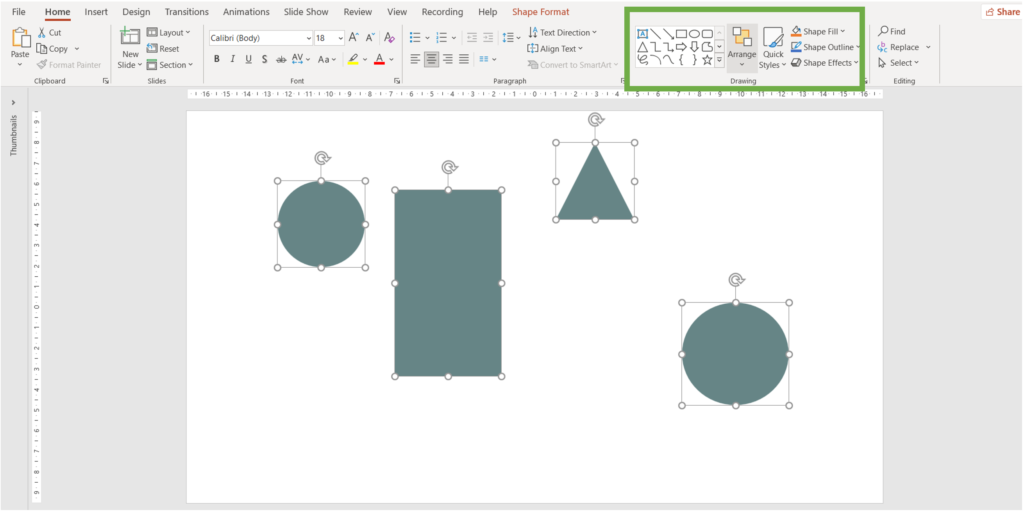
4. In the Arrange group, click on the Align drop-down menu.
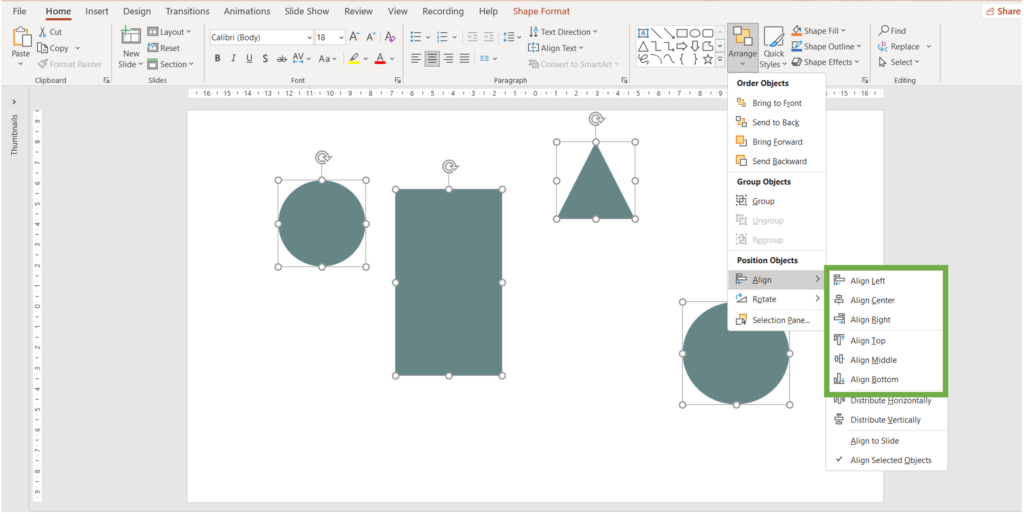
5. Lastly, click on the desired alignment.
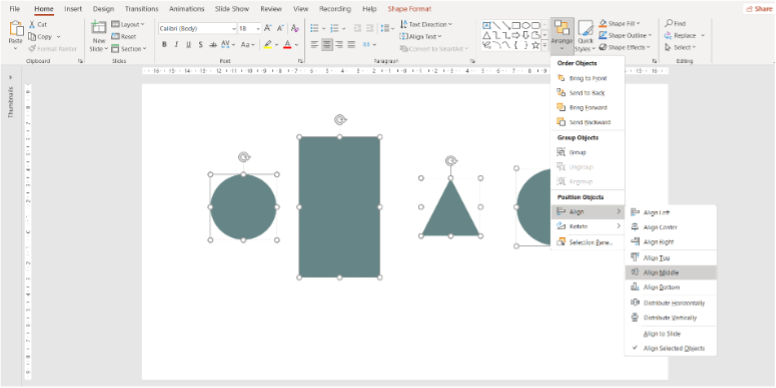
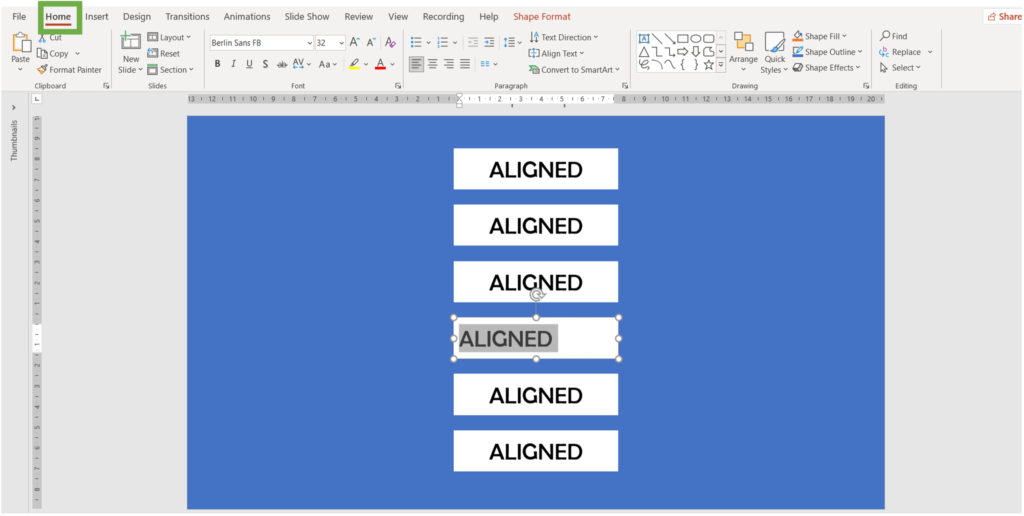
(In the given example, alignment was set to ‘Align Middle’)
Check out the videos below for more examples of top-bottom alignment and left-right alignment of objects in PowerPoint:
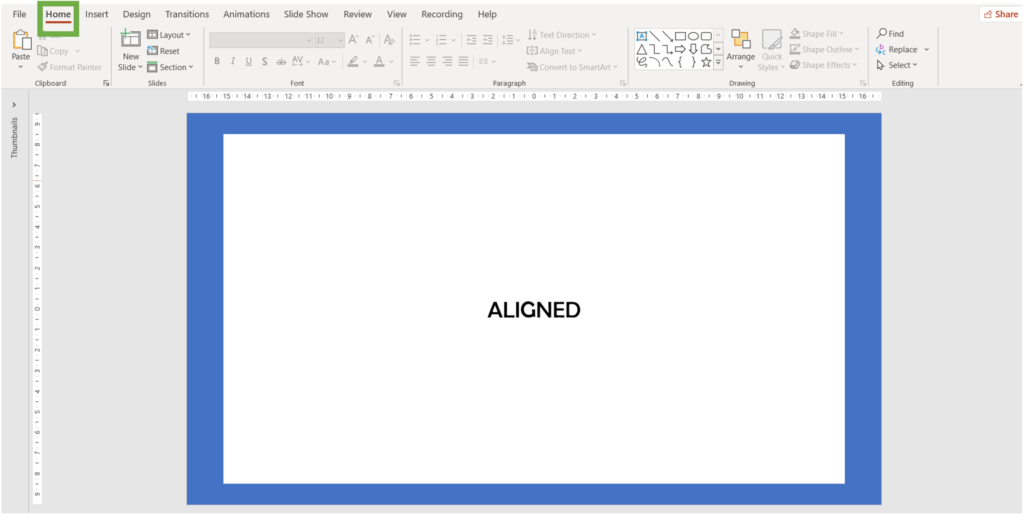
ALIGNMENT OF TEXT BOXES (LEFT, RIGHT & CENTER)
- Select the text that you want to align
2. Go to the Home Tab.
3. Find the Paragraph group

4. Click on any of the following, according to your desired alignment
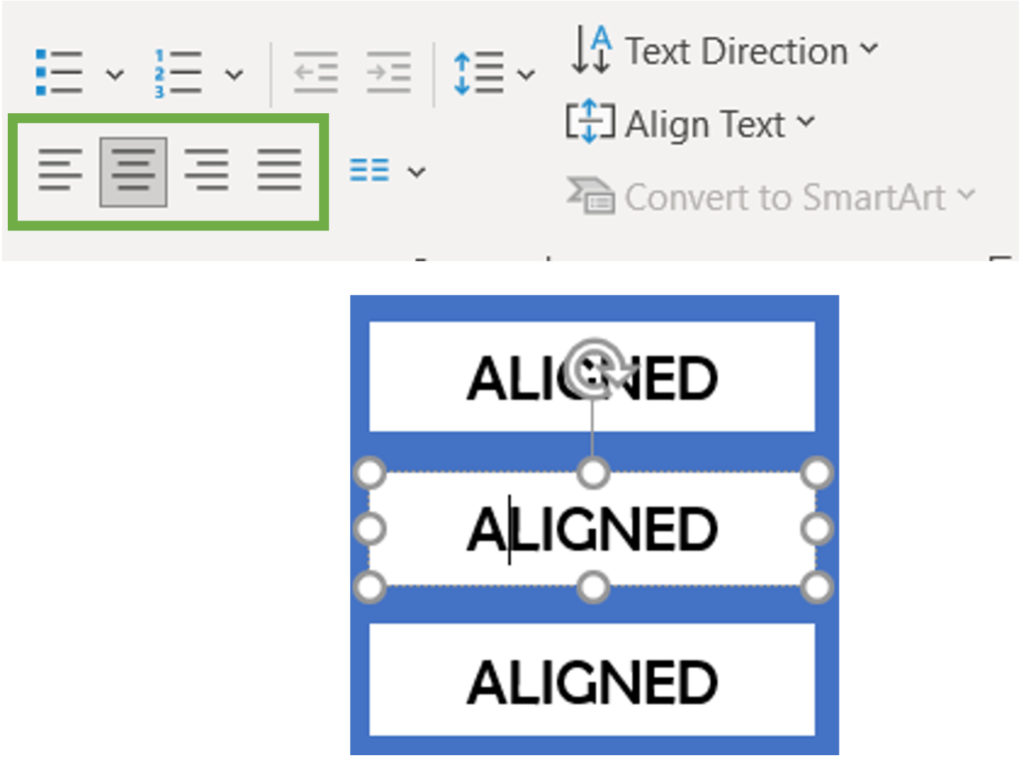
(In the given example, alignment was set to ‘Center Alignment’)
Watch a video replay of the above steps below:
ALIGNMENT OF TEXT BOXES (TOP, MIDDLE & BOTTOM)
- Select the text you want to align. (Text in a Textbox will not work, you can simply align it using your cursor or with the objecting aligning method)
2. Go to the Home Tab.
3. Find the Paragraph group.
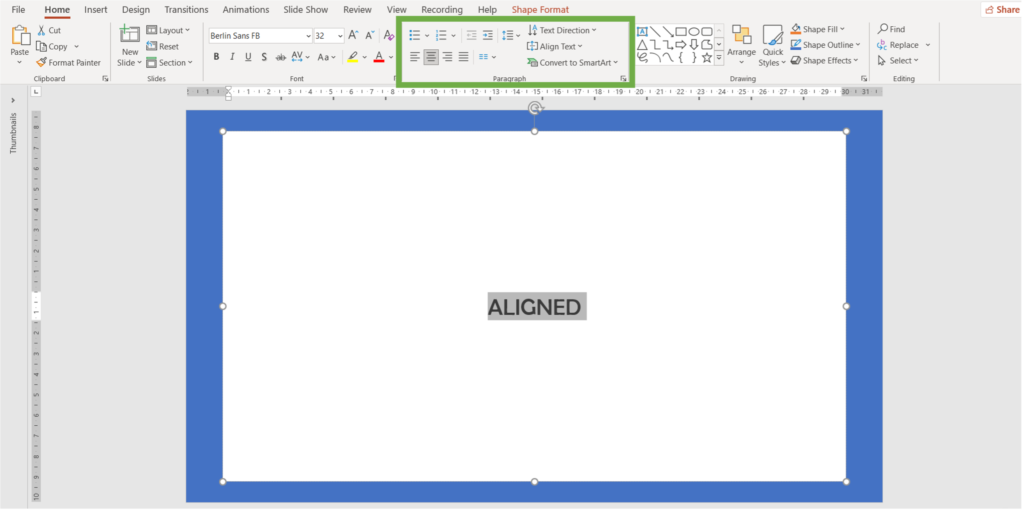
4. Click on Align Text, and a Pop-up will appear.
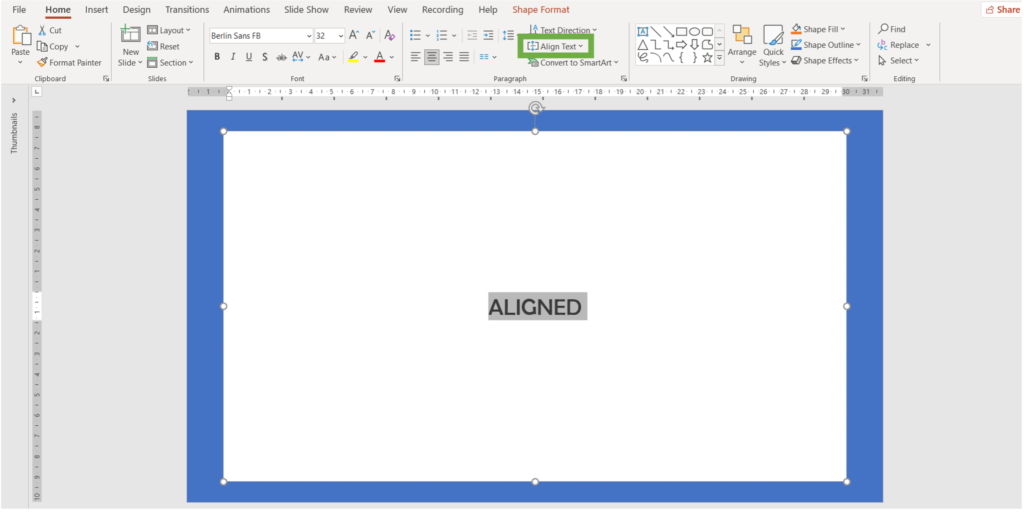
5. Lastly, select your desired alignment.
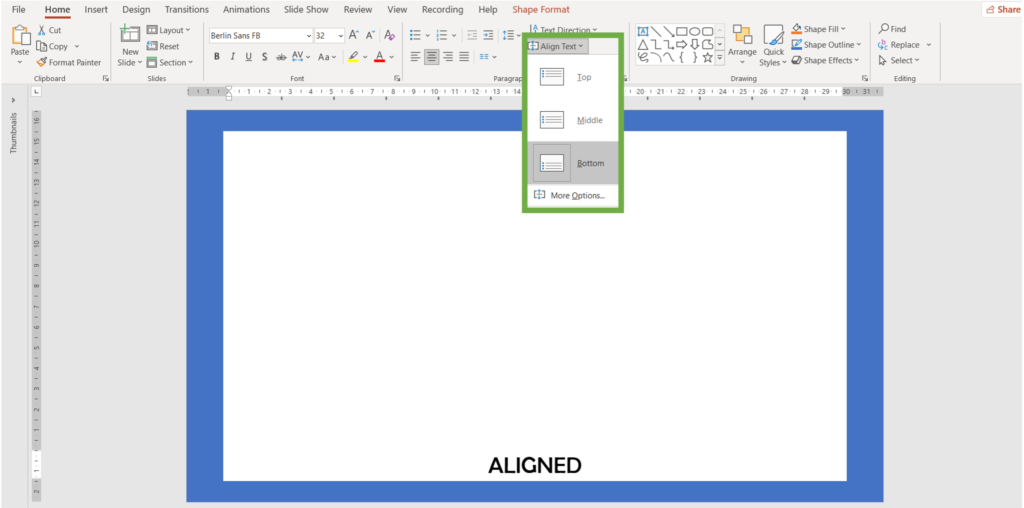
(In the given example, alignment was set to ‘Bottom Alignment’)
You may watch the video below on how we go about doing top, middle and bottom alignment to text on a PowerPoint slide.
ALIGN TO SLIDE IN POWERPOINT
Sometimes you may want to align objects relative to the entire slide rather than to each other. To do this:
- Select the objects you want to align.
2. Go to the “Arrange” dropdown menu.

3. Choose “Align to Slide” before selecting an alignment option like Align Center or Align Middle.
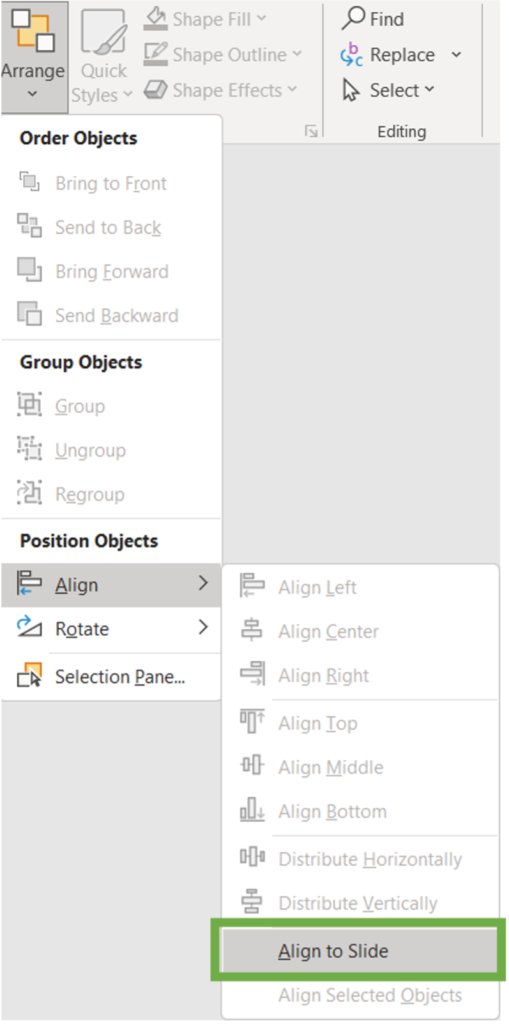
This ensures that the selected objects are aligned based on the slide’s dimensions, which is particularly useful for centering objects on a slide.
Watch the video below to see how you could use the align to slide option in PowerPoint:

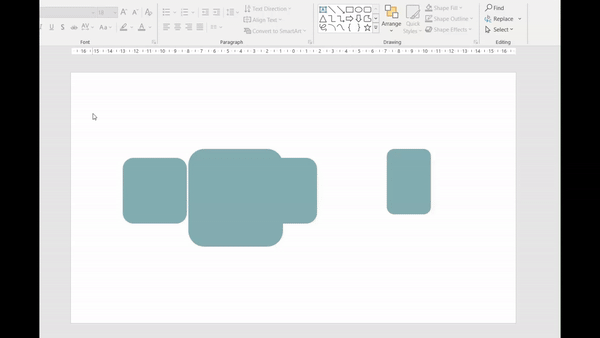
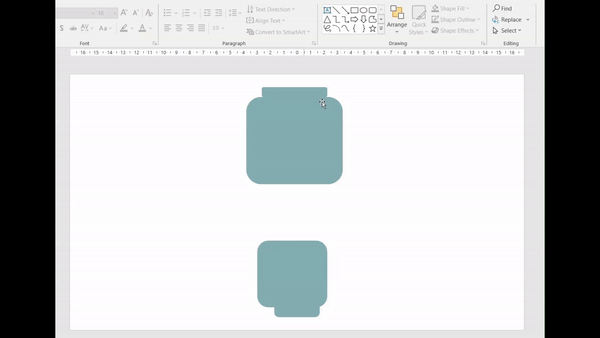
Distribution tool in PowerPoint
Sometimes you wish to properly divide space between objects in your slide, to give it that uniform look. In addition to alignment, the Distribution Tool allows you to distribute objects evenly across your slides enhancing visual coherence. It enables you to space elements evenly horizontally and vertically, eliminating any visual clutter and maintaining a clean layout. Whether you’re arranging bullet points in a list or positioning icons in a row, leveraging the Distribute tool ensures consistent spacing and a professional finish.
- Select the objects you want to distribute.
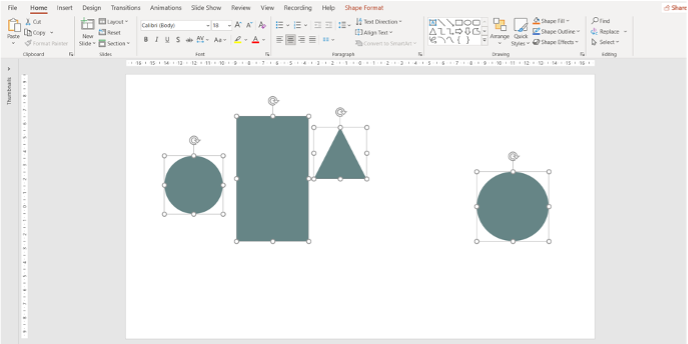
2. Go to the Home Tab.
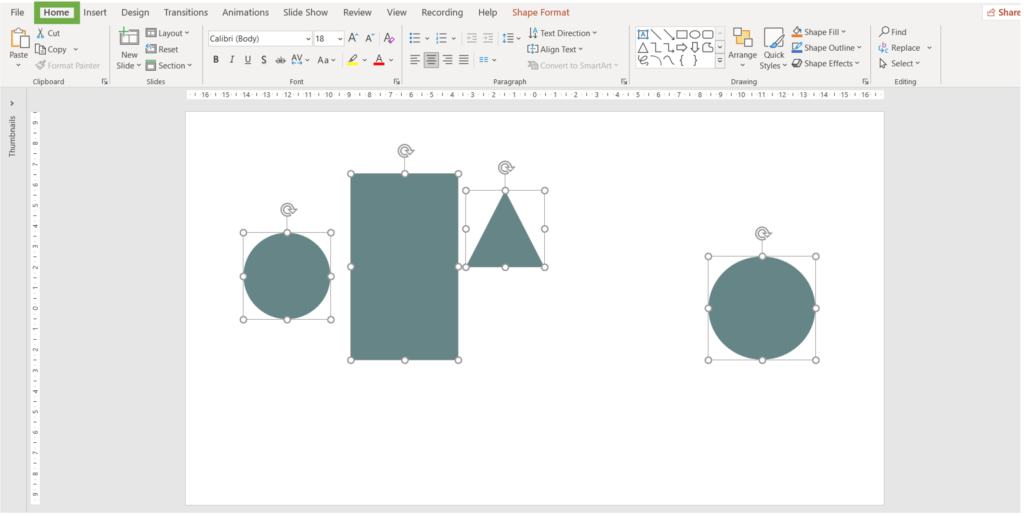
3. Go to the Drawing group and click on Arrange
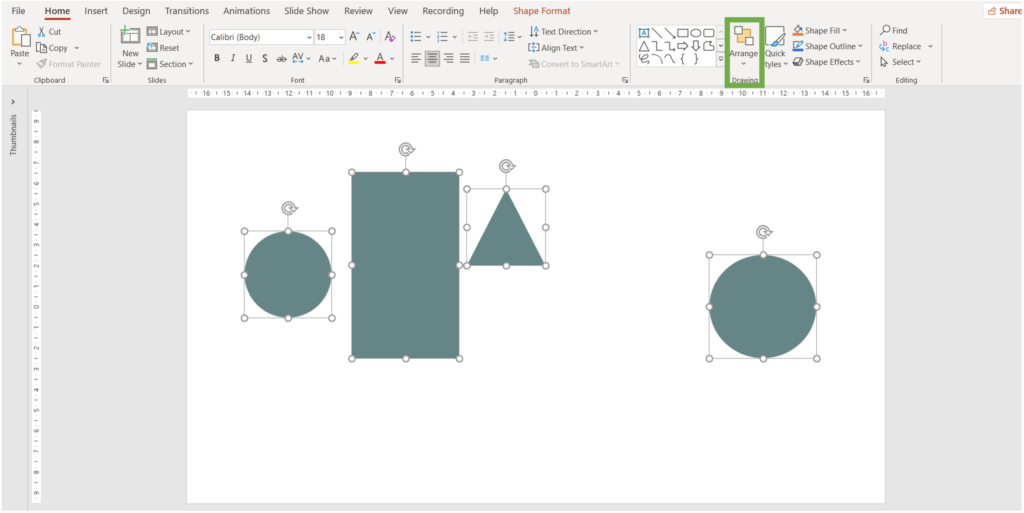
4. Select either Distribute Horizontally or Distribute Vertically
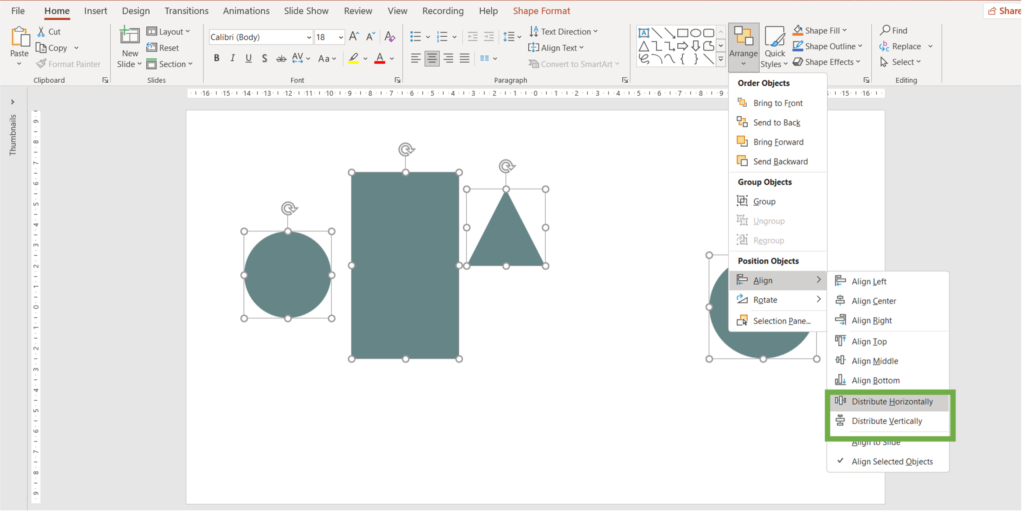
5. This is what you can end up with
(In the given example, ‘Distribute horizontally was used’)
Watch the videos below to understand how you could distribute objects horizontally as well as vertically to ensure they look well organized on a PowerPoint slide.
Using Grids and Guides
Grids and guides in PowerPoint are on-screen references that can help you align objects on a slide and create effective layouts.
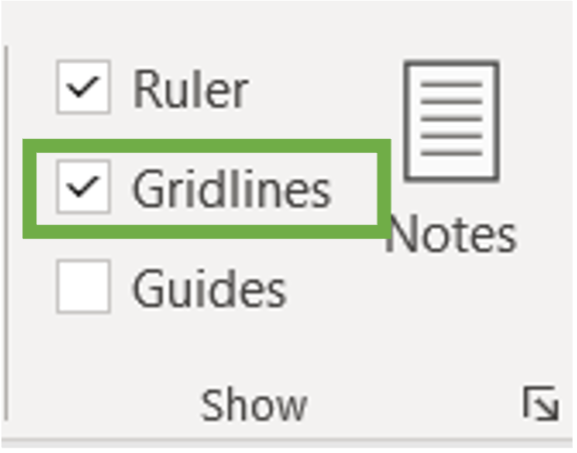
To turn on Gridlines
- Select the View tab

2. Go to the Show group
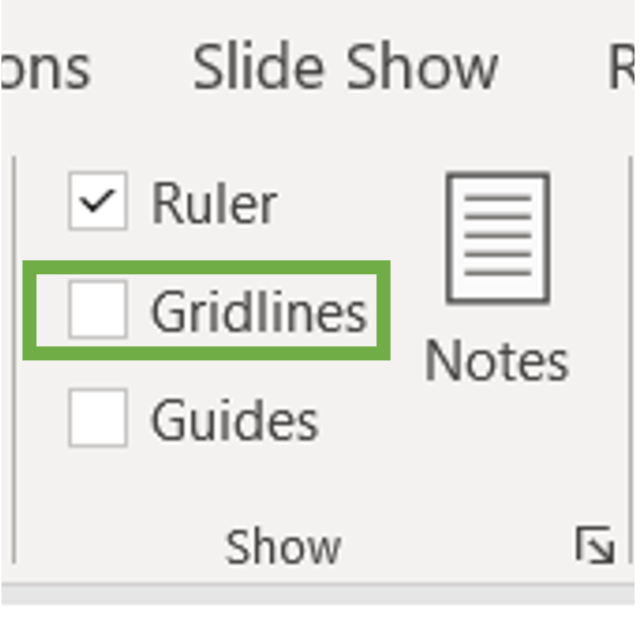
3. Check the Gridlines checkbox
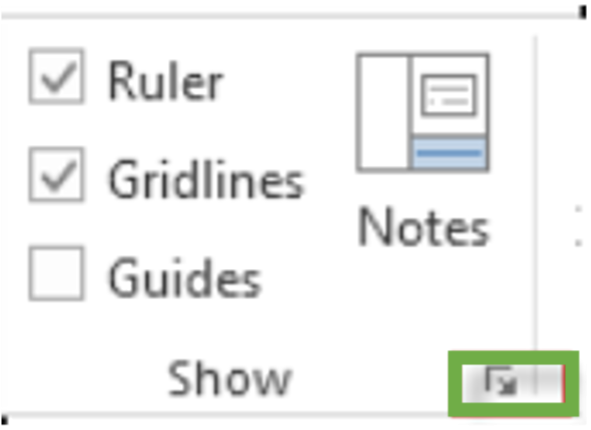
4. To turn on the snap-to option, Select View on the ribbon, and in the Show group, select the dialog box launcher.
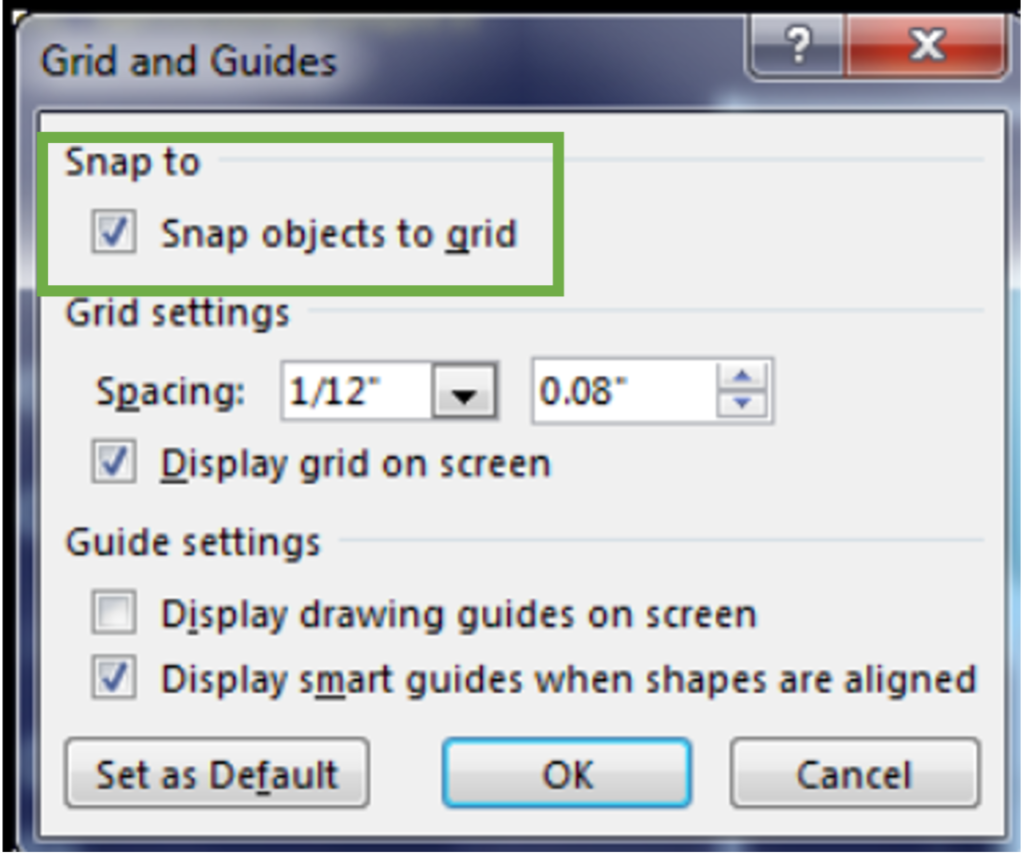
5. To position shapes or objects to the closest intersection of the grid, under Snap to, check the Snap objects to grid box.
Watch in the video below how the snap features work on the gridlines on a PowerPoint slide:
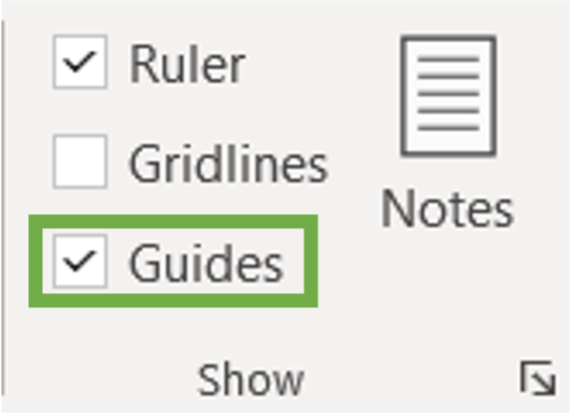
To turn on Guides
- Select the View tab

2. Go to the Show group
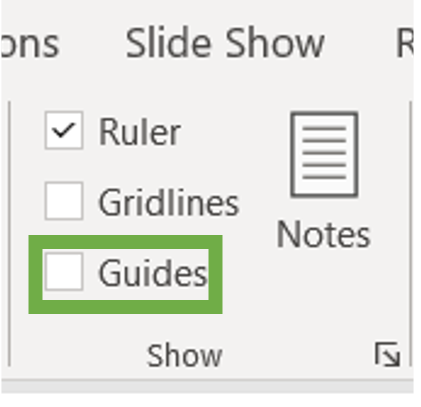
3. Select Guides to show the horizontal and vertical center lines
Use Smart Guides
PowerPoint’s “Smart Guides” are dynamic alignment aids that appear as you move objects around the slide. These guides help you align objects relative to each other and to the slide center. Smart Guides are enabled by default and appear as red dashed lines when an object is aligned with another object or the center of the slide.
- Select an object and begin to move it.
2. Red dashed lines—smart guides–appear so you align items vertically, horizontally, or both. Smart guides also appear between objects or near the edges of the slide to help you space out objects evenly.
Conclusion
Mastering the alignment in PowerPoint feature can significantly enhance the quality and professionalism of your presentations. By understanding and utilizing the various alignment tools and techniques, you can create clean, organized, and visually appealing slides. Remember to use gridlines, guides, and smart guides to assist with precise alignment, and take advantage of grouping and distributing objects to maintain consistent spacing and organization. With these PowerPoint skills, your presentations will not only look more polished but also communicate your message more effectively.

